COMPSCI 280 Project3: Facial Keypoint Detection
implementation and comparison between different approaches for facial keypoint detection, ranging from direct coordinate regression to heatmap-based detection methods
url: https://alt-js.github.io/post/280pj3
Part 1: Direct Coordinate Regression
Implementation details
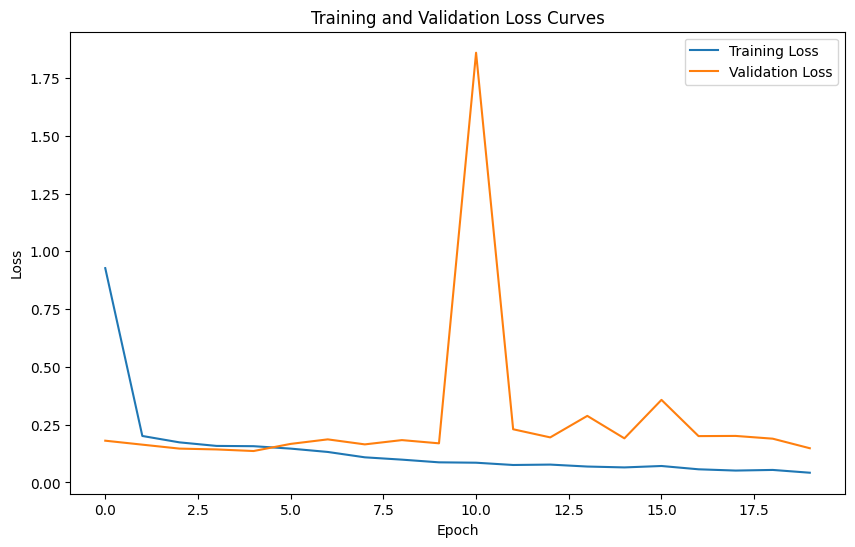
I’m using SmoothL1Loss for the SimpleNet training(the weights is from SmoothL1Loss) and learning rate 5e-4. This SimpleNet model is a straightforward convolutional neural network designed for facial keypoint detection. It takes a single-channel 224×224 grayscale image as input and applies a series of four convolutional blocks—each block consisting of convolution, batch normalization, ReLU activation, max pooling, and dropout—to progressively extract and compress features, reducing the image size down to roughly 13×13. The resulting feature map is then flattened and passed through three fully connected layers, with the final layer outputting 136 values corresponding to 68 (x, y) keypoints. The network also uses Xavier initialization for the FC layers to improve convergence during training.
Training and validation loss curves
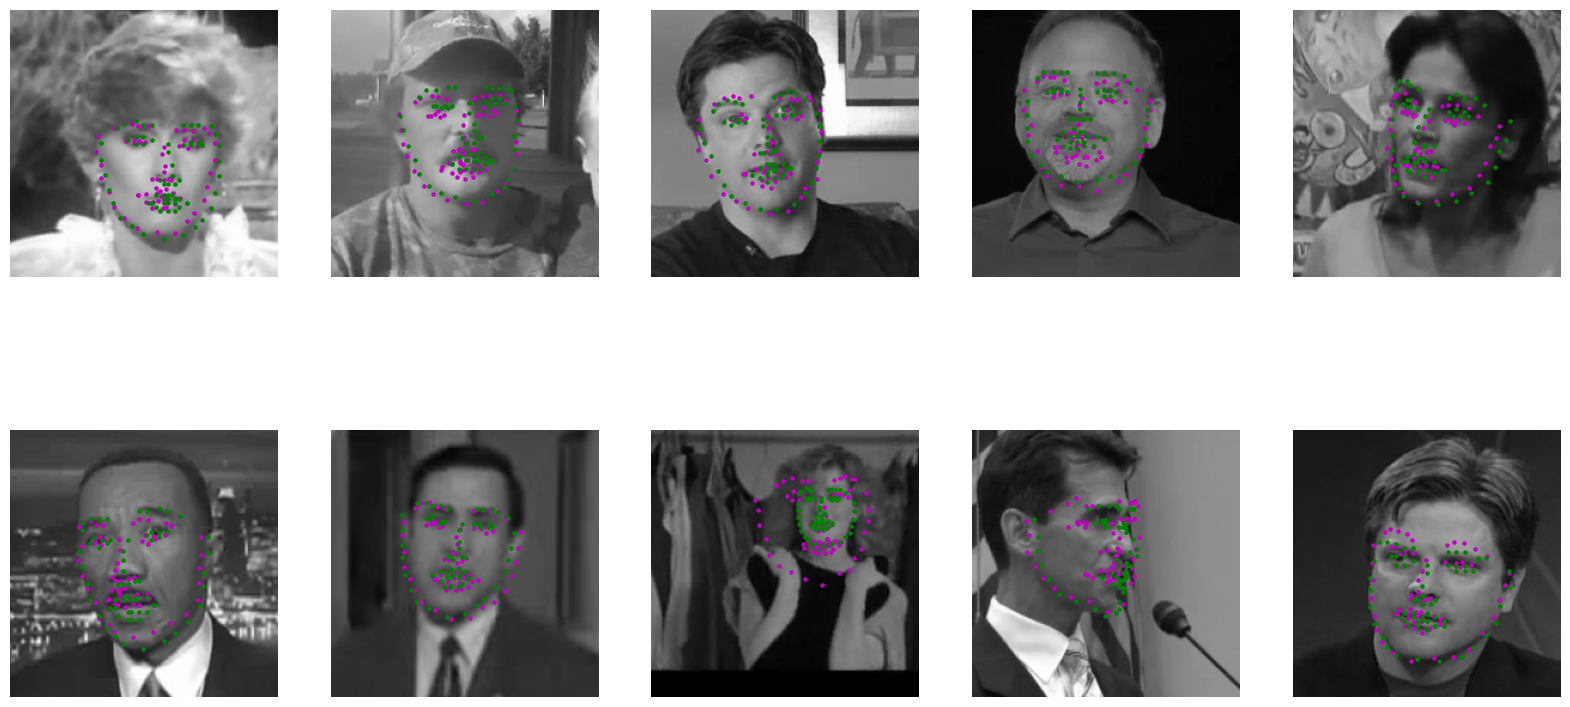
Visualizations on test images
Pros and Cons
SimpleNet is easy to design and fast to run, but it doesn’t converge well and the result isn’t OK to use in real applications because the keypoints aren’t real to be actual human faces.
Part 2: Transfer Learning for Keypoint Detection
Implementation details
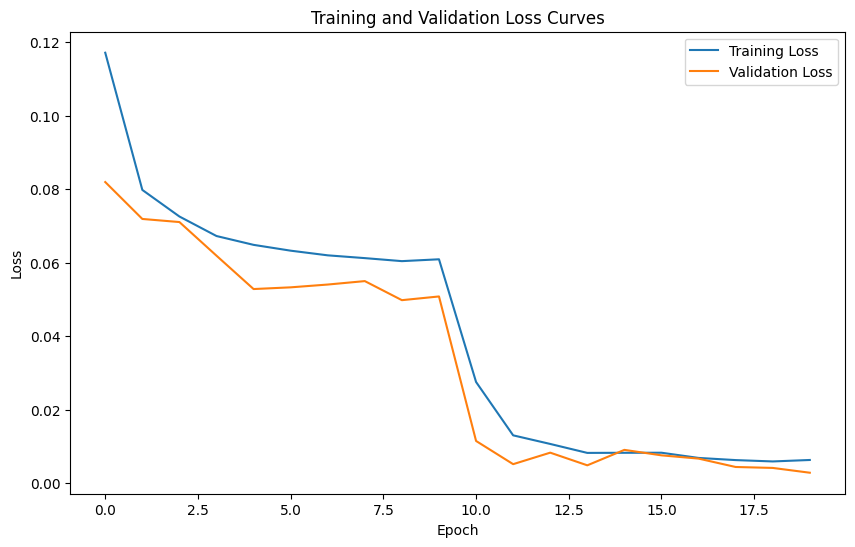
This model is a modified ResNet-18 adapted for facial keypoint detection on grayscale images. It takes a 1-channel image as input by replacing the first convolutional layer with a new one that accepts a single channel, and its weights are initialized by averaging the pretrained RGB weights. The final fully connected layer is replaced with a new linear layer that outputs 136 values corresponding to 68 (x, y) keypoints. Additionally, the model supports an optional parameter to freeze the backbone for transfer learning, ensuring that only the final regression head is trained if desired. I set 10 epoches for the first stage where the pretrained backbone is frozen and only train the new layers, and I finetuned the whole model for another 10 epoches where all the parameters are active. Both stages has a learning rate of 5e-4.
Training and validation loss curves
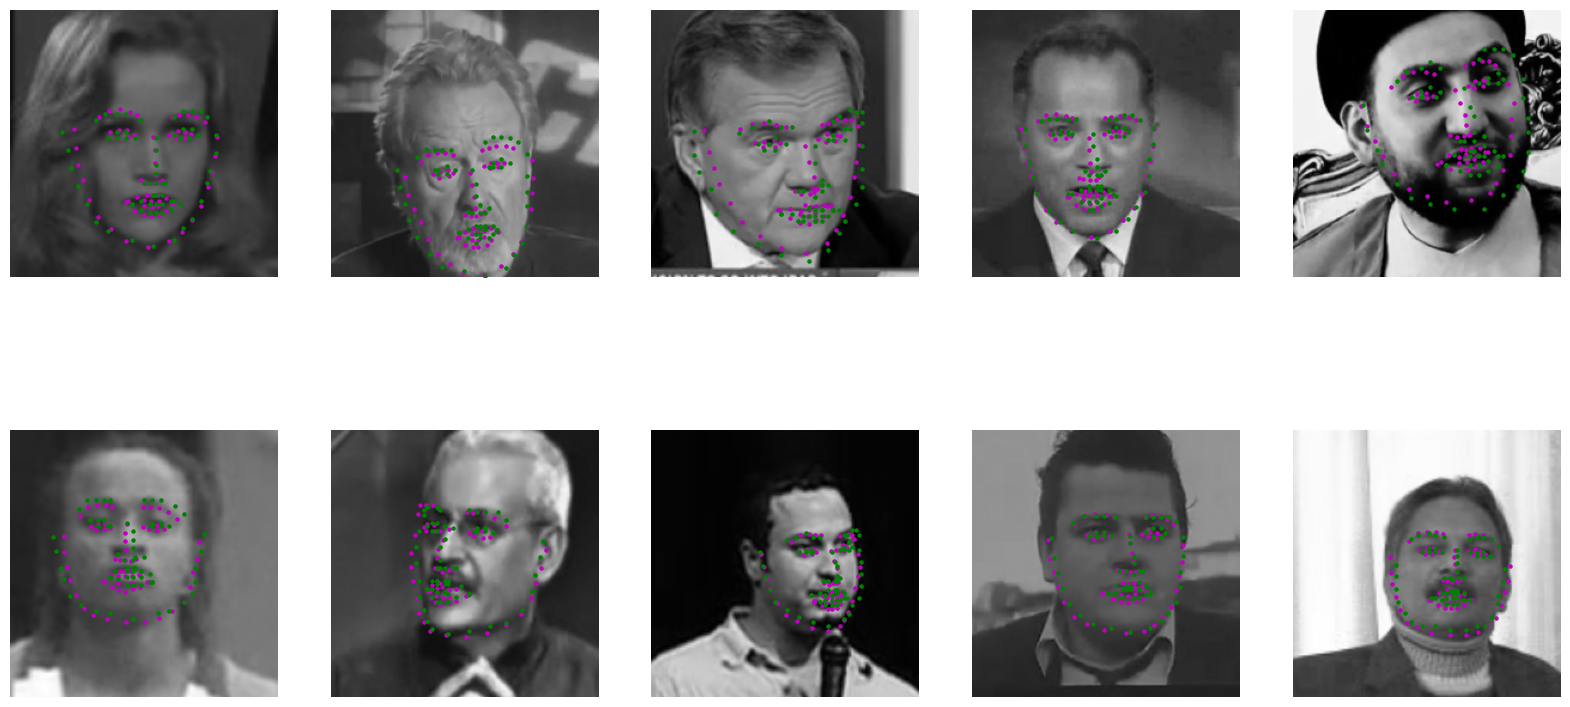
Visualizations on test images
Pros and Cons
The Resnet18 yields better performance compared to the previous SimpleNet and thanks to utilizing existing pretrained backbone, it’s not too hard to design the network. Although it costs more time compared to the SimpleNet, its results show way less flaws and I would say it’s applicable for natural human face keypoint detection.
Part 3: Heatmap-based Keypoint Detection
Implementation details
This UNet model is an encoder-decoder architecture designed for keypoint heatmap prediction, taking a single-channel image and outputting 68 heatmaps. In the encoder (or “down” part), the network applies several sequential convolutional blocks—each consisting of two convolution layers with batch normalization and ReLU activation—to progressively extract features while preserving spatial information, and uses max pooling to reduce spatial resolution after each block, storing intermediate outputs as skip connections. The bottleneck further processes the compressed representation with a deeper convolutional block that doubles the feature channels, while the decoder (or “up” part) upsamples the bottleneck output using transposed convolutions and concatenates it with the corresponding skip connections (after resizing if needed), followed by additional convolutional blocks to refine the combined features. Finally, a 1×1 convolution projects the features to the desired number of output channels (68), with each channel representing the predicted heatmap for a facial keypoint.
For the keypoint extraction function, it extracts keypoint coordinates from predicted heatmaps by processing a batch of heatmaps with shape [B, K, H, W], where B is the batch size, K is the number of keypoints, and H and W are the heatmap height and width. For each sample in the batch and for each keypoint channel, it flattens the heatmap into a 1D tensor and uses argmax to find the index of the highest activation, which is assumed to correspond to the keypoint location. The index is then converted back into two-dimensional coordinates by computing the row (y-coordinate) as the quotient of the index divided by W and the column (x-coordinate) as the remainder of that division. The coordinates for each keypoint are collected per sample and ultimately returned as a tensor containing all predicted keypoints.
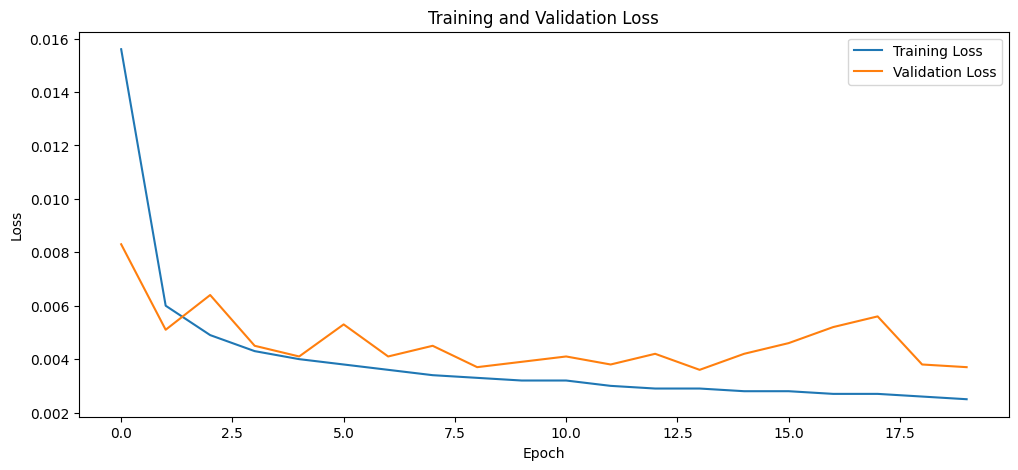
Training and validation loss
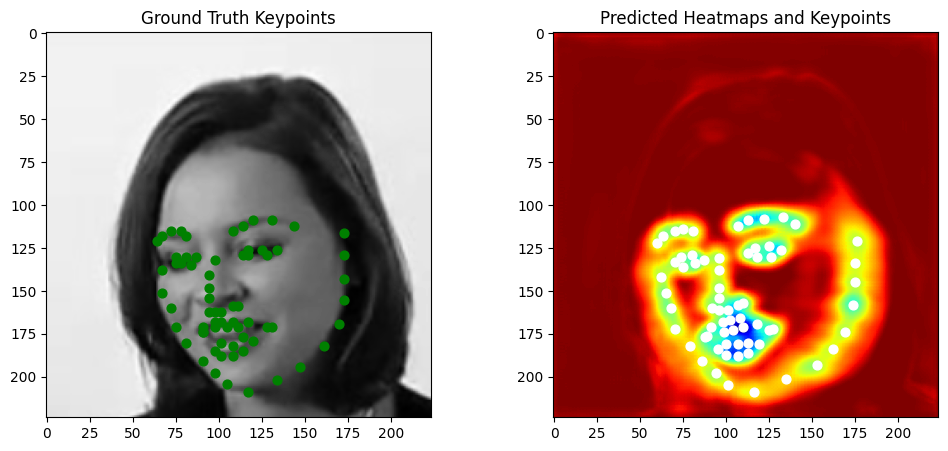
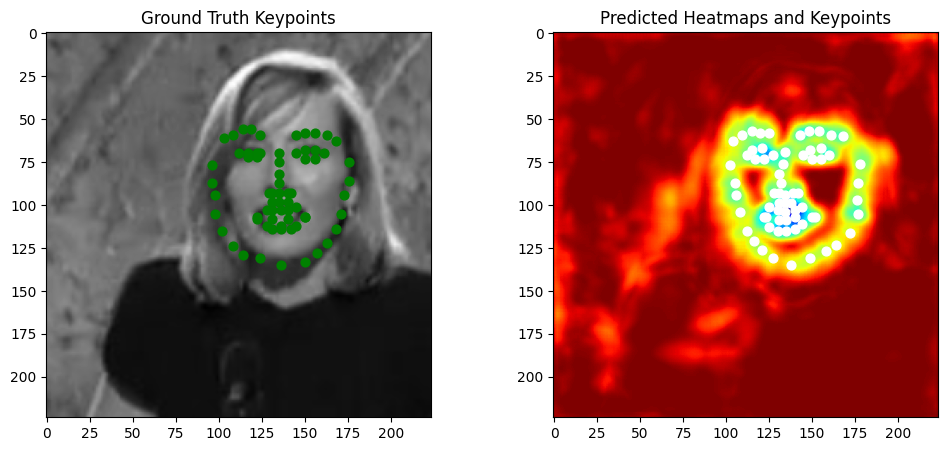
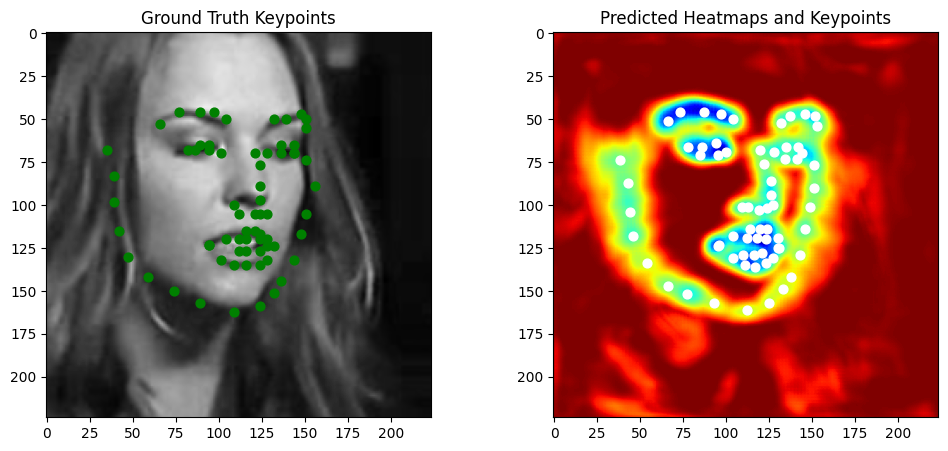
Visualizations on test images
Click to zoom in.
 |
 |
|---|---|
 |
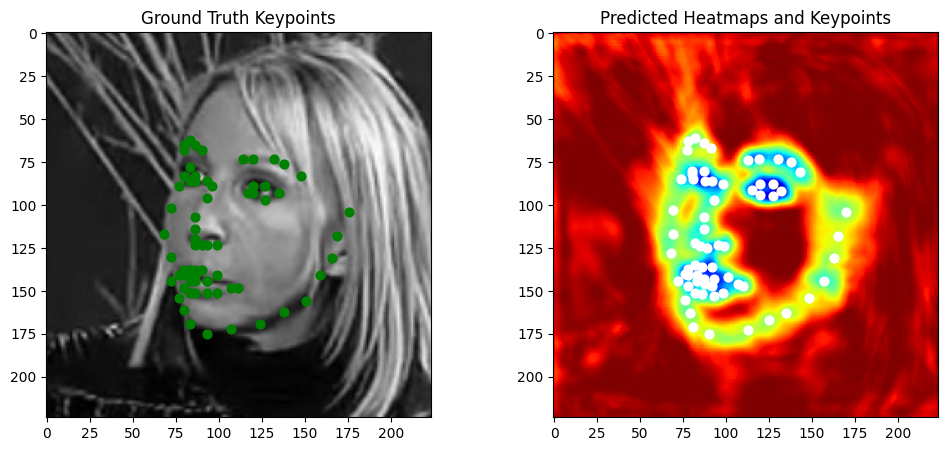 |
Pros and Cons
The UNet result is very satisfying and it converges really fast, you can get decent workable model in 2~3 epoches, and its validation loss is also low. The cons is that UNet in my approach is sensitive to learning rate, in my test 1e-4 yields nice and consistent results.
Discussion
I started out to have really random and bad results with the heatmaps and the keypoints extracted from the keypoints. I showed my picture results to one of my friend and he said, “Your UNet looks like an edge detector.” I thought about it intuitively, the sigma in my heatmap, it was 1 originally. If the heatmap only has sigma=1, the heatmap can only cover a relatively small amount of area in the picture, and the feature it extracts will probably be an edge, that’s probably why it looked like an edge detector. So I cranked up the sigma to 2.5(not too big), and the UNet started to behave very nice.
Misc
Here are three model weights: https://drive.google.com/file/d/10GPoXDNmRQ9vKUgeF9YZ5Y3g_5lE5i6m/view?usp=sharing
https://drive.google.com/file/d/18SkoUGENJywnrIW2g3LVnK3OxS9jDQdo/view?usp=sharing
https://drive.google.com/file/d/1IVIEIwCkIZ618gGq4wSG24NfUtl2SNEA/view?usp=sharing
Here is the .ipynb file:
https://drive.google.com/file/d/1PMTGhzRGHqDZ11OWpXvznUgYt07QMsHT/view?usp=sharing
Jiashen Du
Undergrad Student major in CS
My research interests include Artificial Intelligence, Deep Learning, Computer Vision and LLMs.