COMPSCI 184 Project2: Geometric Modeling
build Bezier curves and surfaces using de Casteljau algorithm, manipulate triangle meshes represented by half-edge data structure, and implement loop subdivision
Part 0: Project overview
This homework focuses on implementing fundamental operations related to Bezier curves, Bezier patches, mesh manipulation, and Loop subdivision. In this project, we started out from the basic Bezier curve and de Casteljau algorithm, and extend it to 2D surfaces. We also made a fully functional mesh “editor” that does edge flipping, edge splitting and mesh upsampling. The most challenging parts were ensuring correct pointer assignments in the edge splitting and properly handling newEdge in Loop subdivision.
Section 1: Bezier Curves and Surfaces
Part 1: Bezier Curves with 1D de Casteljau Subdivision
Briefly explain de Casteljau’s algorithm and how you implemented it in order to evaluate Bezier curves.
De Casteljau’s algorithm is used to determine the point on the Bezier curve of a certain number of points. For $n$ points, we iteratively use linear interpolation to determine $n-1$ points, until we only have one point, which is $p_{\frac{n(n-1)}{2}}$. This particular point will be on the Bezier curve of $p_{0}$ and $p_{n-1}$ from the original $n$ points.
I wrote a seperate lerp function and iterate it through all the points. The lerp function is defined as:
$$\text{lerp}(p_i, p_{i+1}, t) = (1 - t) p_i + t p_{i + 1}$$
The new points generated is the one-step result of all the original points.
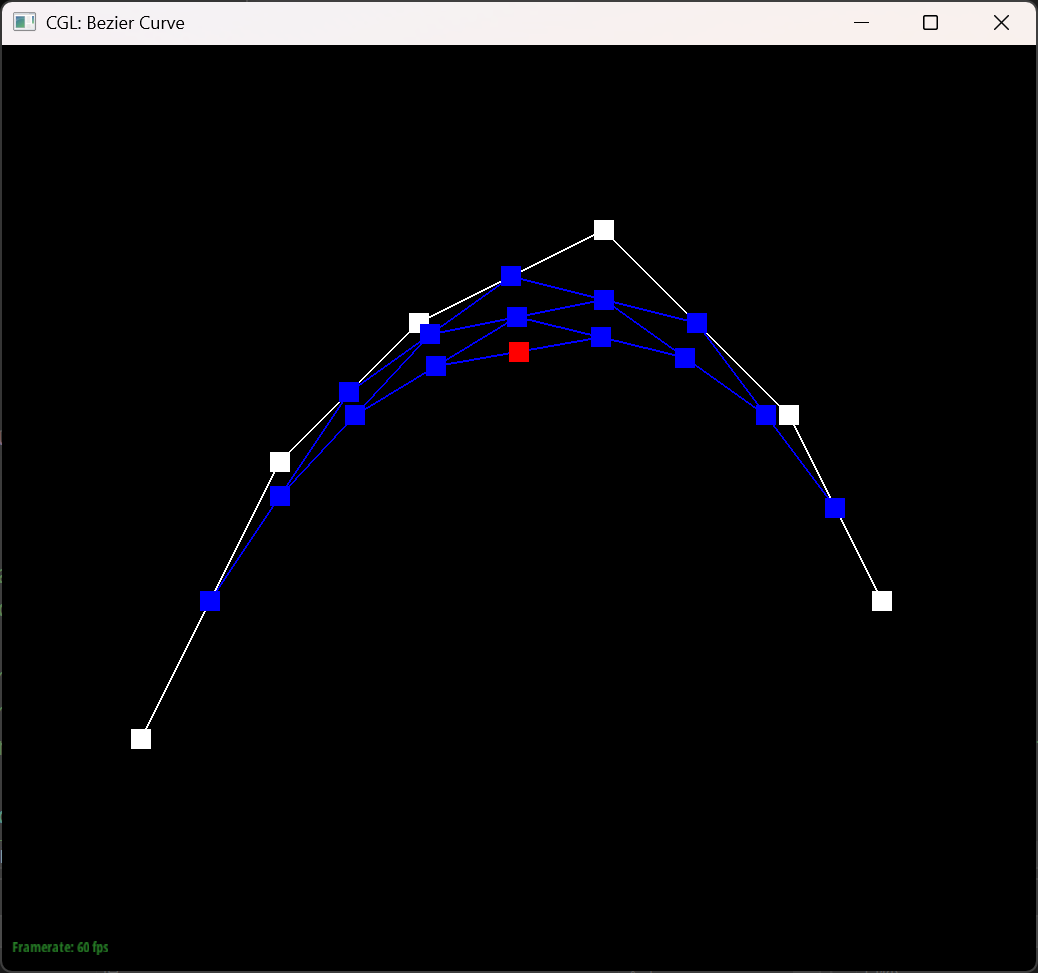
The Bezier curve with 6 control points
The six pictures below shows the 5 steps of evaluation of the original 6 control points and the final bezier of the points.
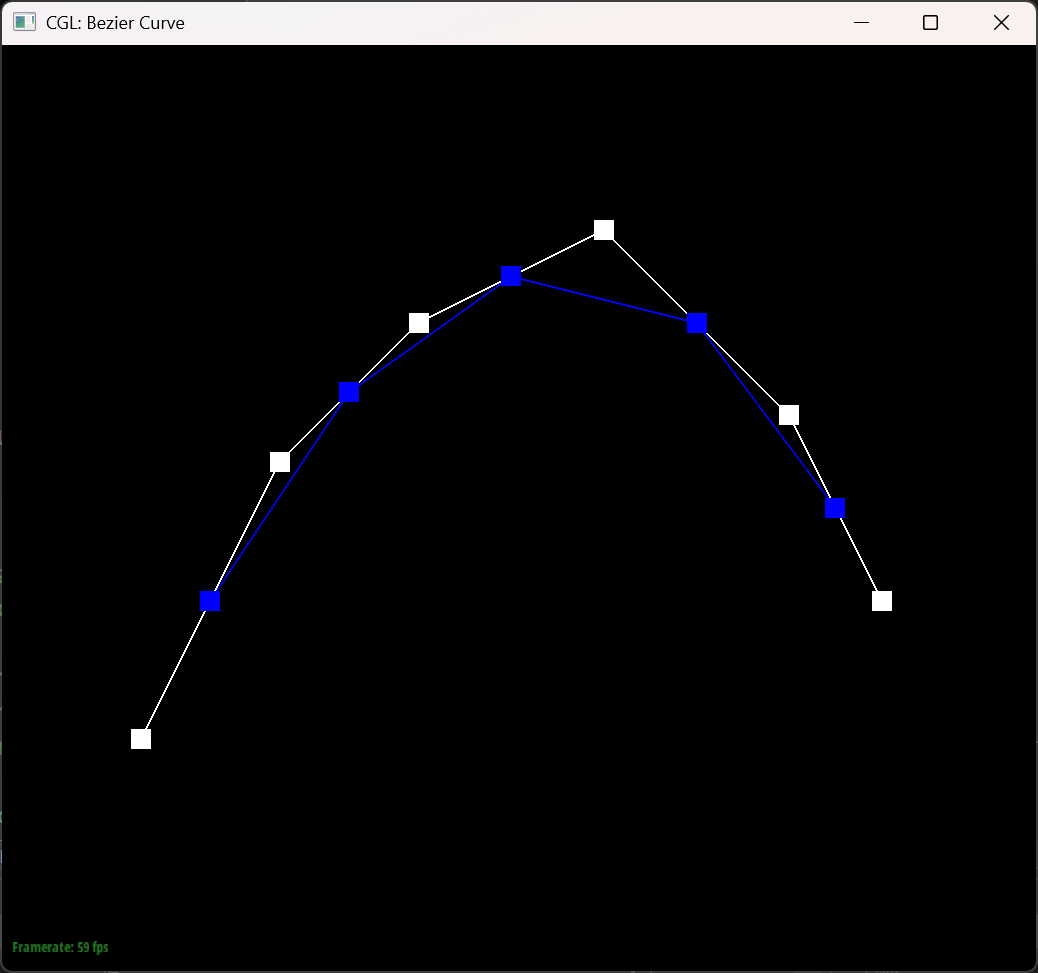
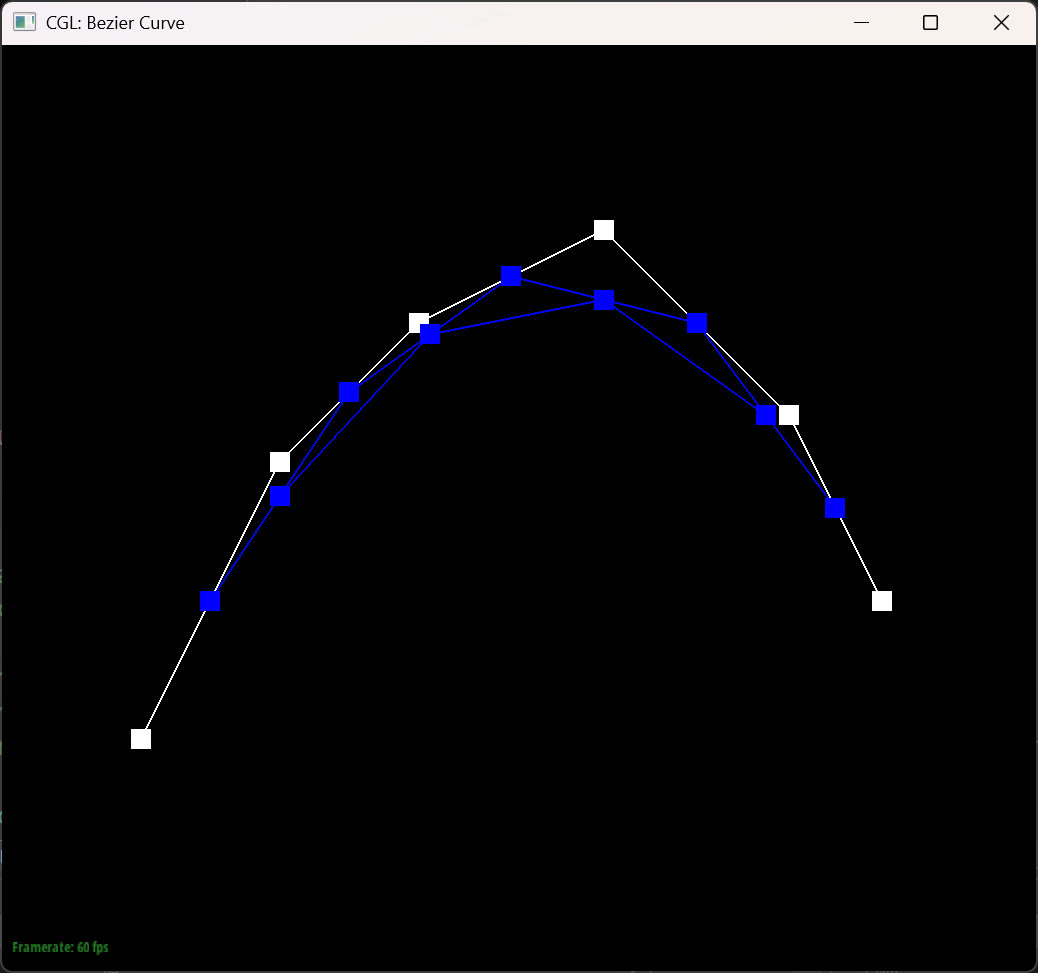
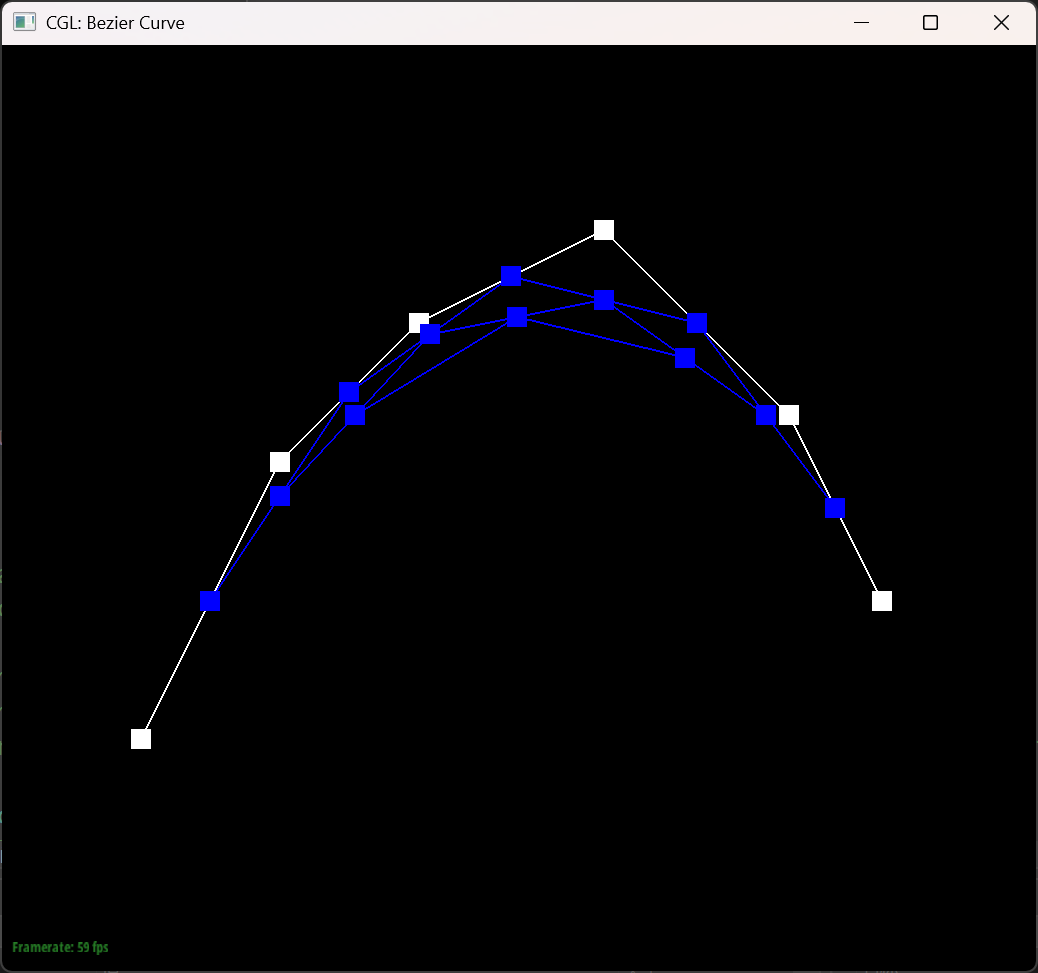
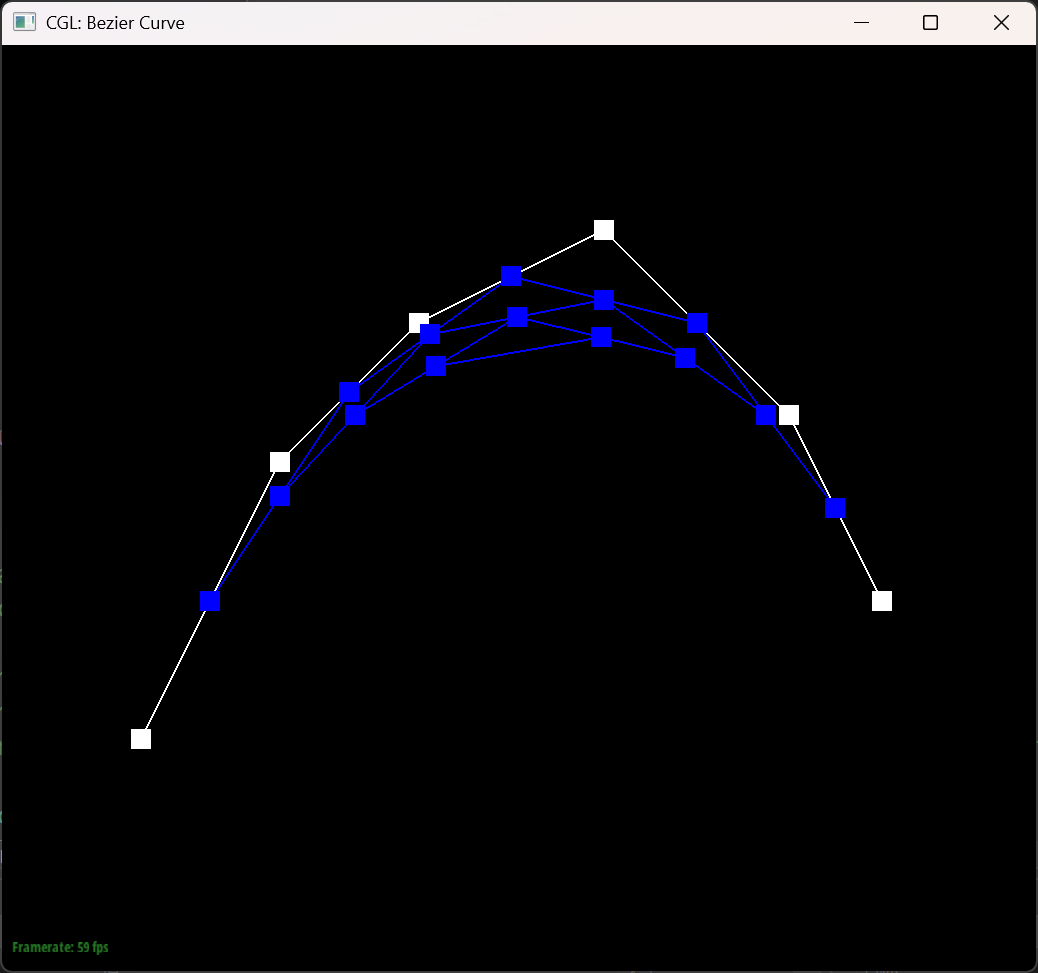
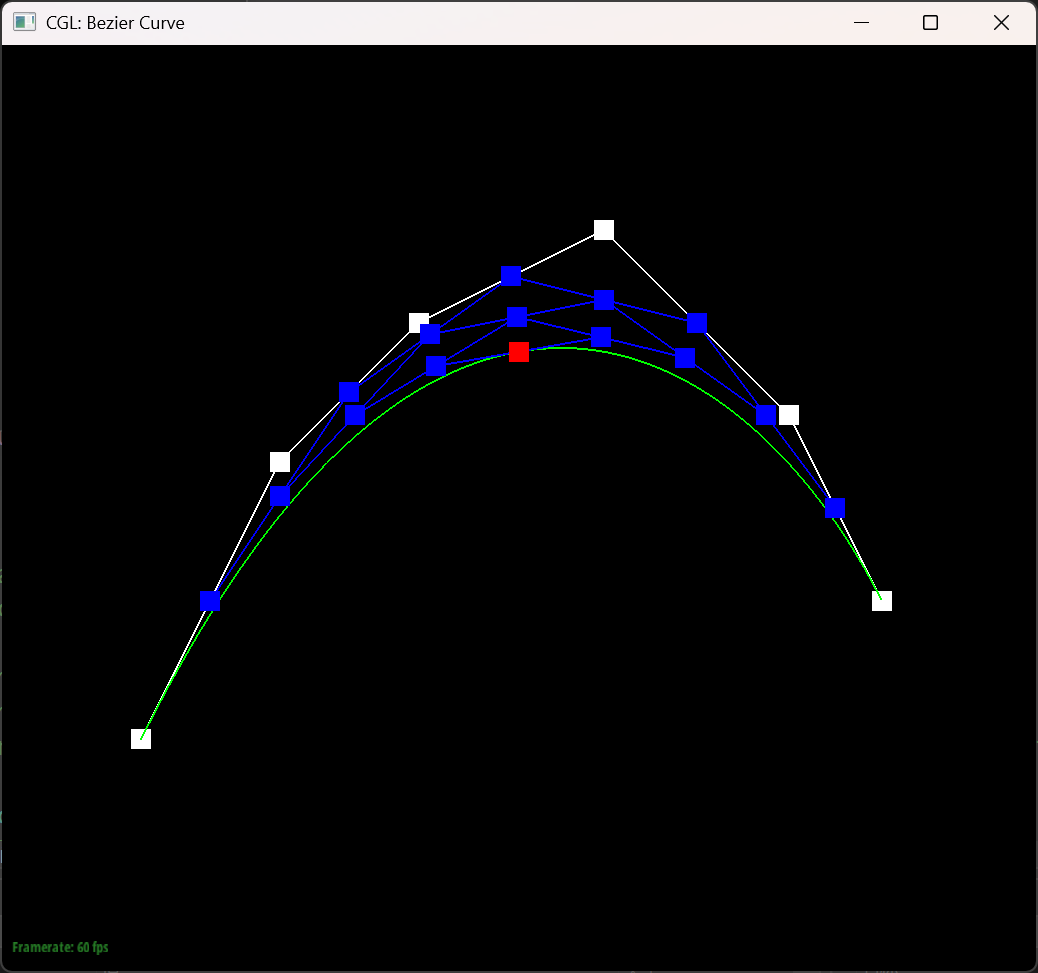
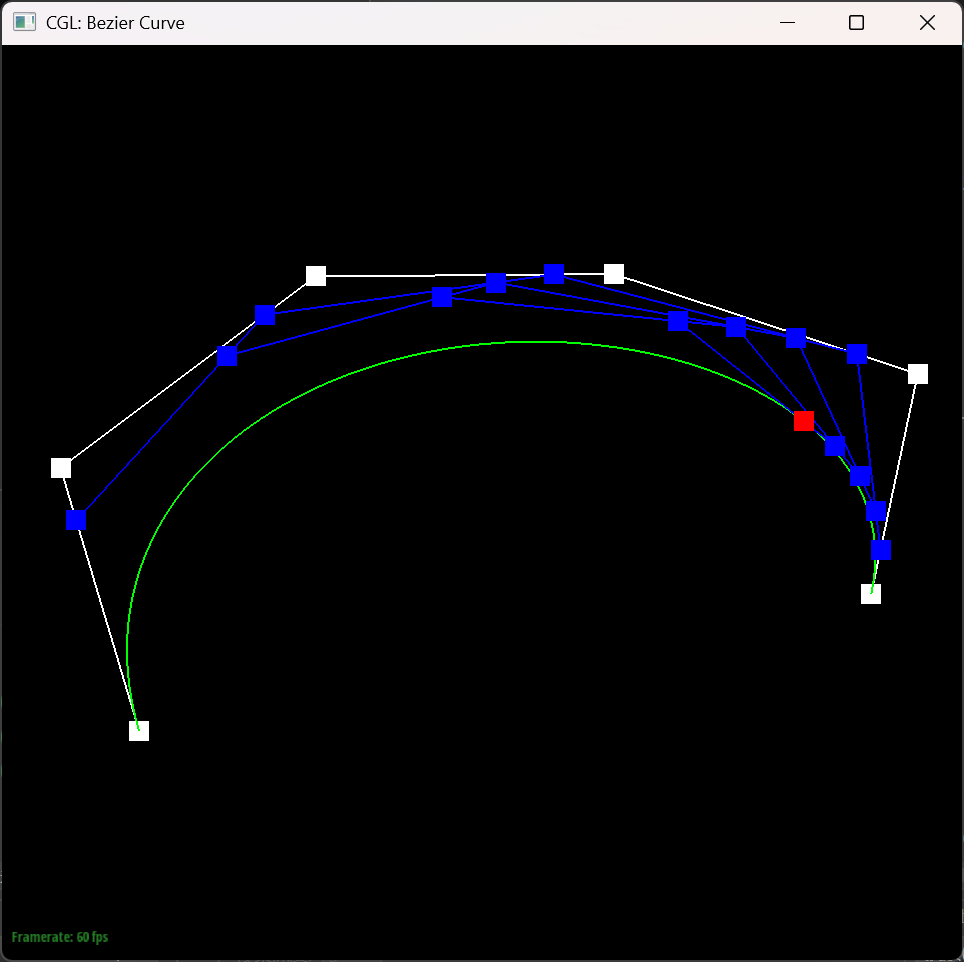
In this picture I changed the position of the points and the $t$ value.
Part 2: Bezier Surfaces with Separable 1D de Casteljau
Briefly explain how de Casteljau algorithm extends to Bezier surfaces and how you implemented it in order to evaluate Bezier surfaces.
The de Casteljau’s algorithm naturally extends to Bezier surfaces by applying the same interpolation process in two directions $u$ and $v$. For each row of control points $P(i,j)$, apply the de Casteljau algorithm recursively to compute an intermediate set of points at parameter $u$, reducing the row into a single point. Once you have the intermediate points from the previous step, apply de Casteljau along the $v$-direction to interpolate these points and obtain the final surface point $S(u,v)$.
I modified the lerp function to make it accept Vector3D inputs and outputs, and the evaluate process is just call evaluate1D on controlPoints, and return with the results of the previous loop being run in the evaluate1D again but with a different interpolation parameter. The evaluate1D function also loops through points with evaluateStep but only returns the 0-th dimension of the result.
The teapot result
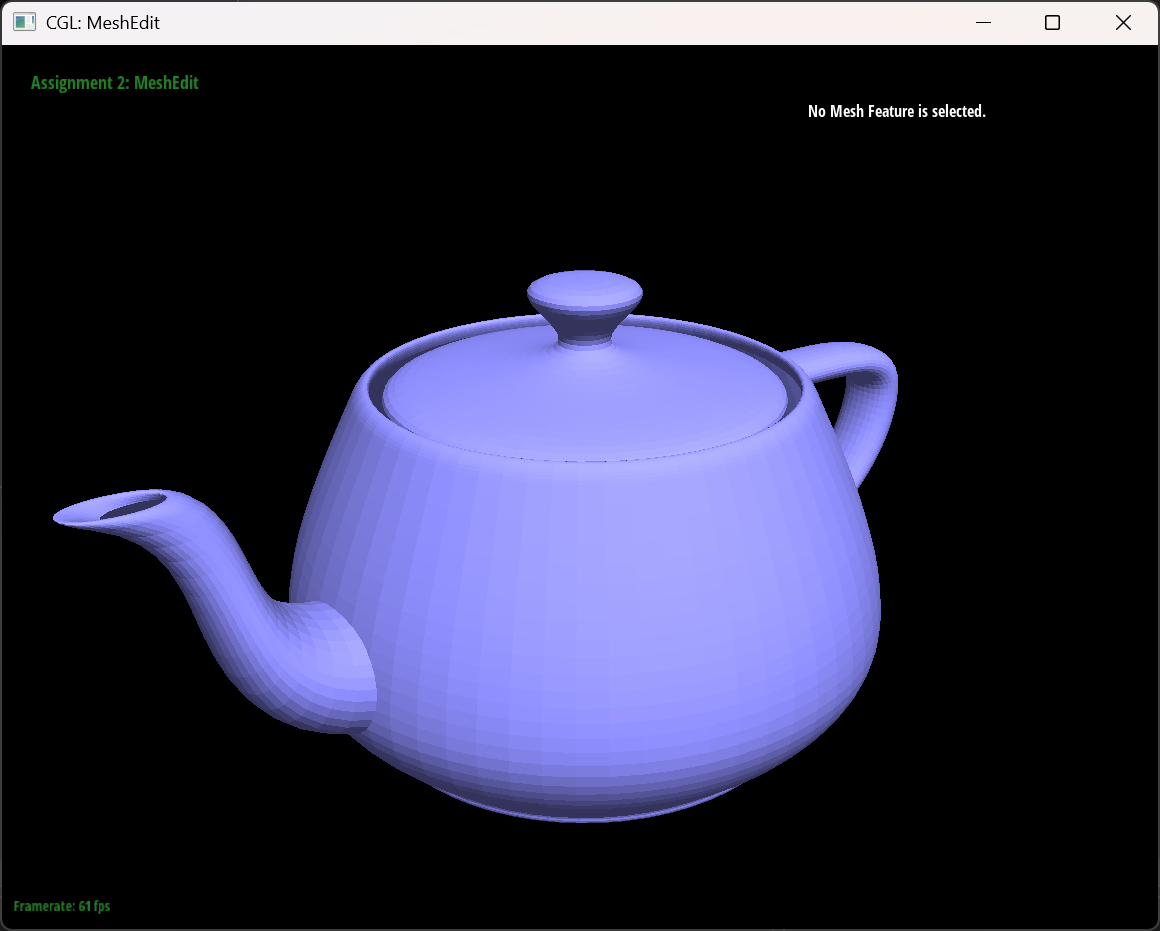
bez/teapot.bez evaluated by my implementation
Part 3: Area-Weighted Vertex Normals
Briefly explain how you implemented the area-weighted vertex normals.
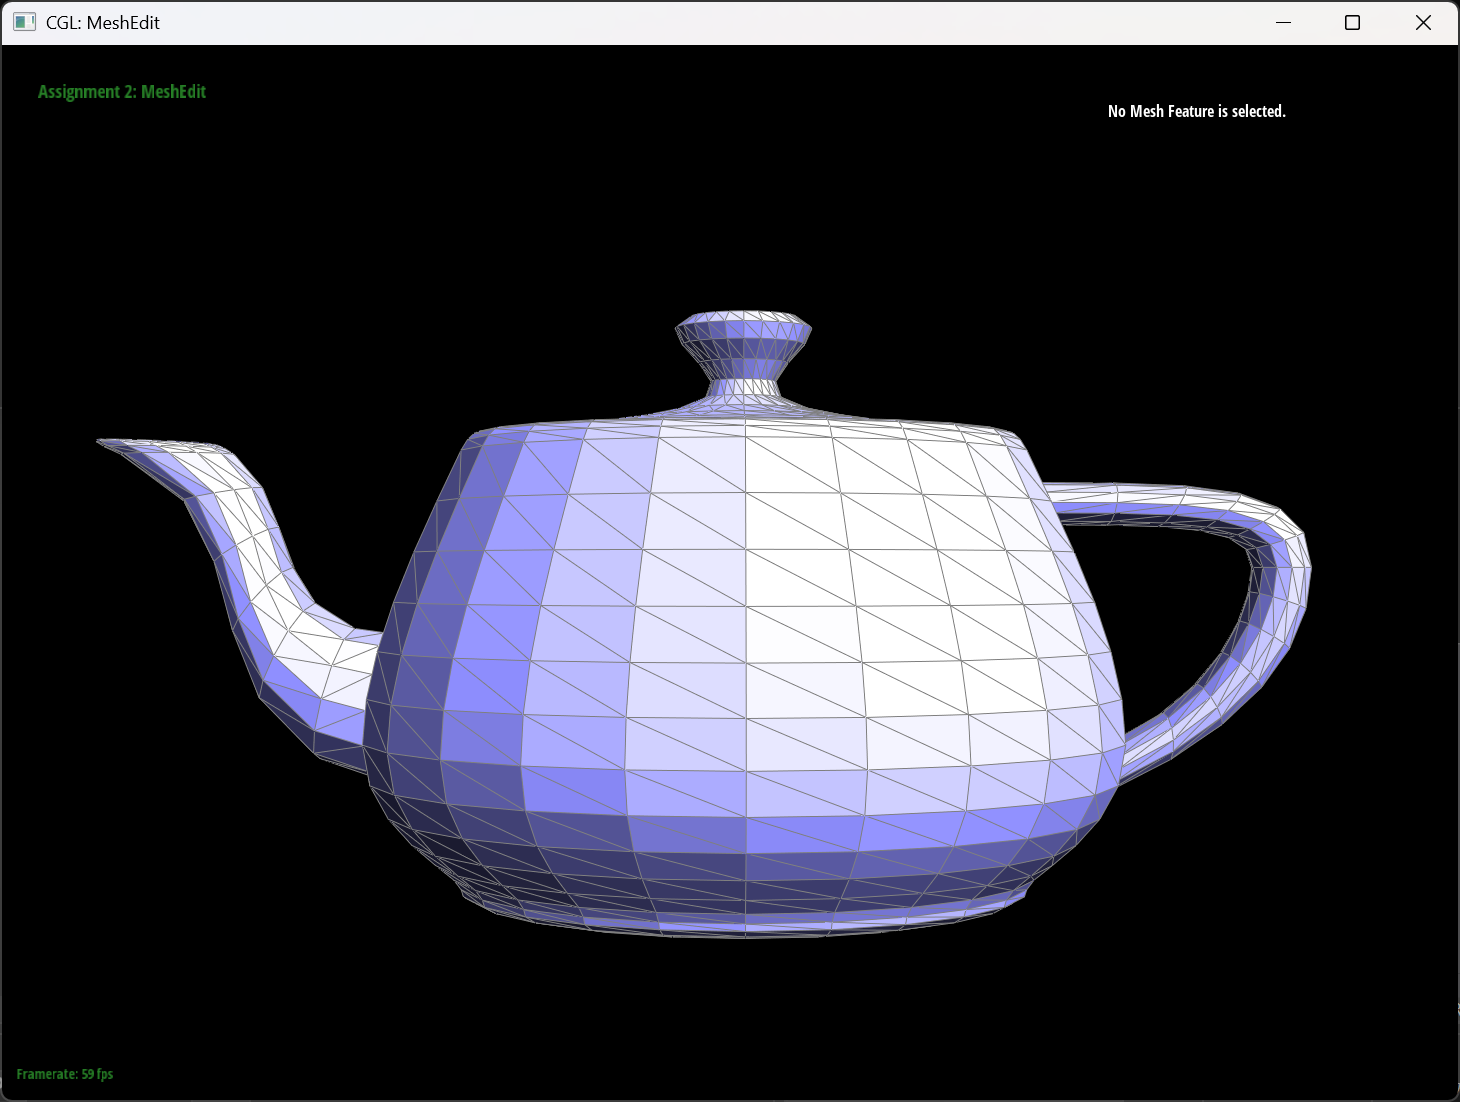
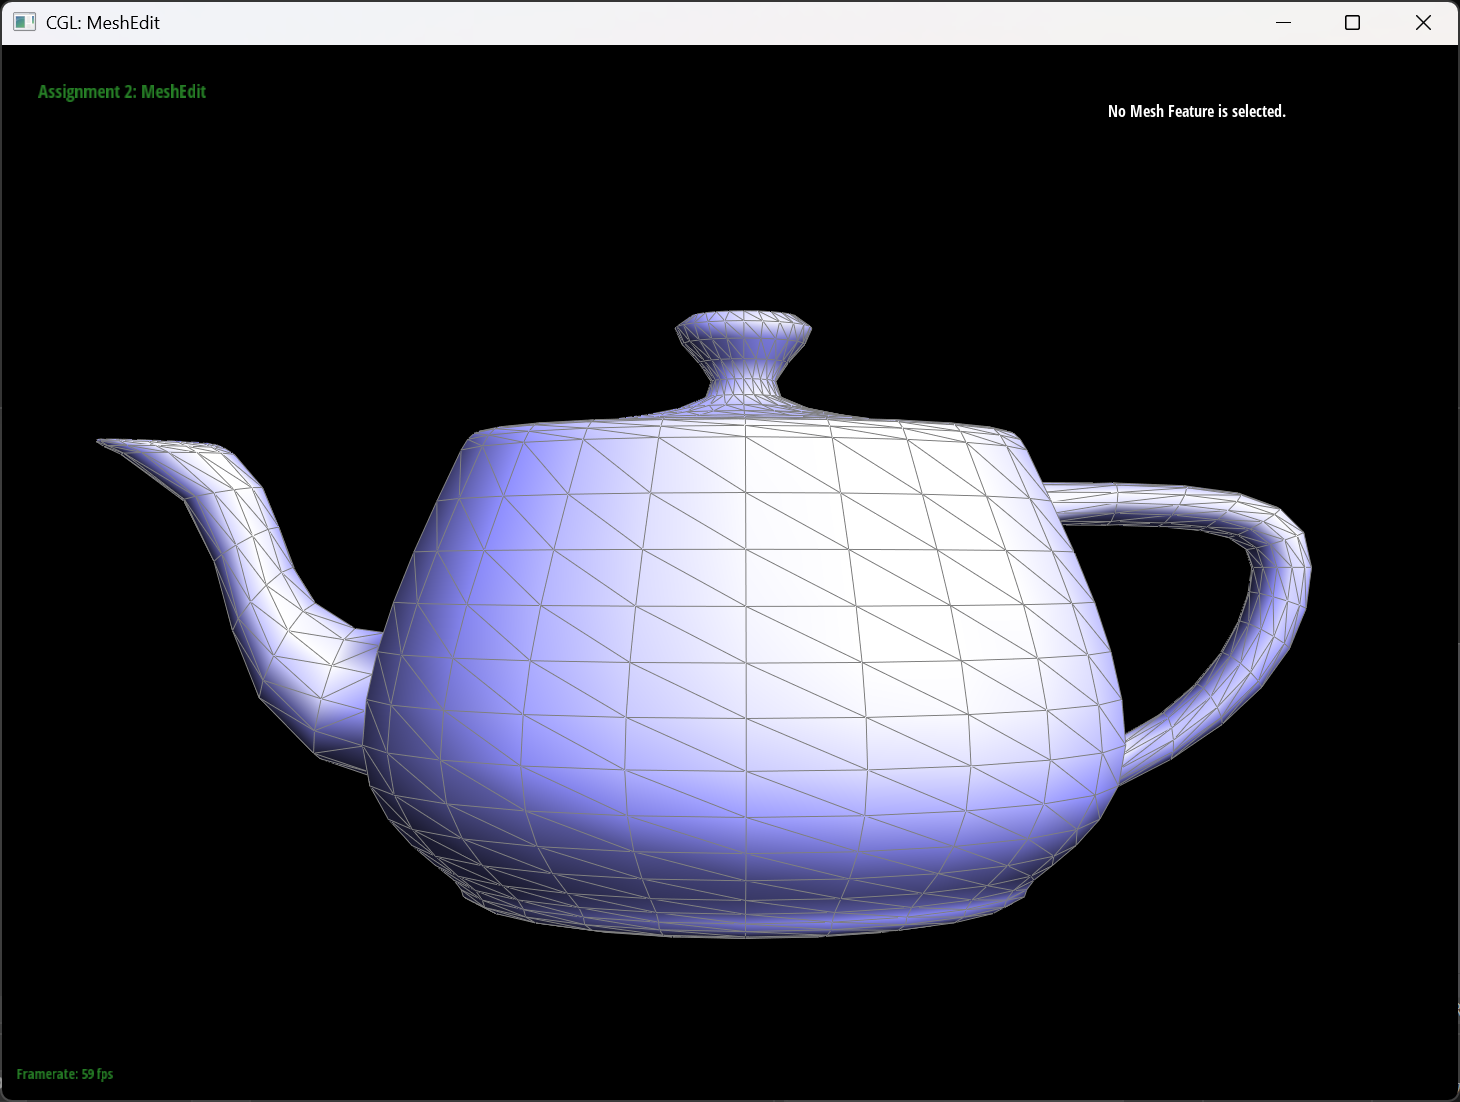
Started with one halfedge, we iterate through every halfedge. For every halfedge, we extract the previous, current, next vertex position, and calculate the cross product of vectors defined by current and next vertex and current and previous vertex. We add up all the cross products and restore it to unit vector as the output.
The teapot result
 |
 |
|---|---|
| default flat shading | Phong shading |
Part 4: Edge Flip
Briefly explain how you implemented the edge flip operation.
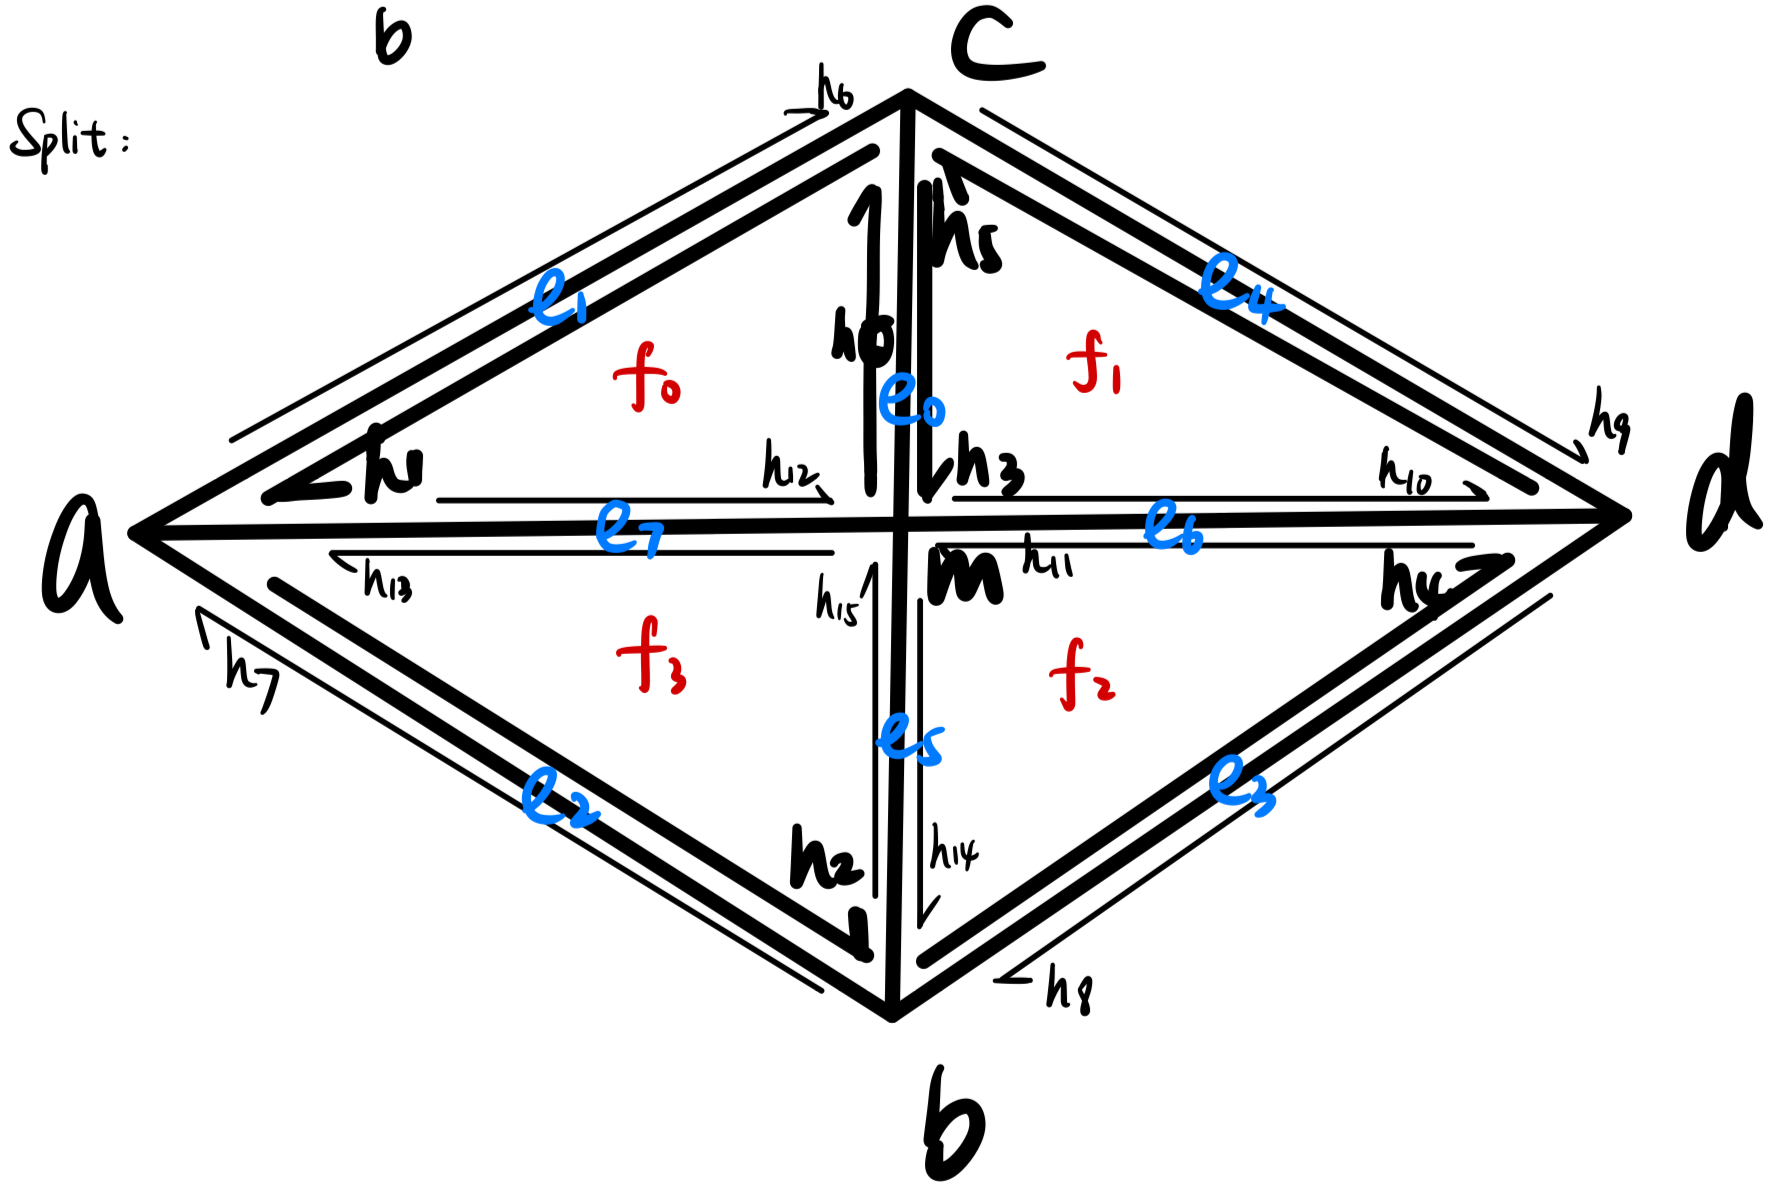
I first determine every possible element of a unit pair of triangles, then, I changed the relations of every possible related halfedge using setNeighbors function, and assign the faces and vertices with the correct halfedge in the end. Here’s a picture that contains all the notations I’m using in my code.

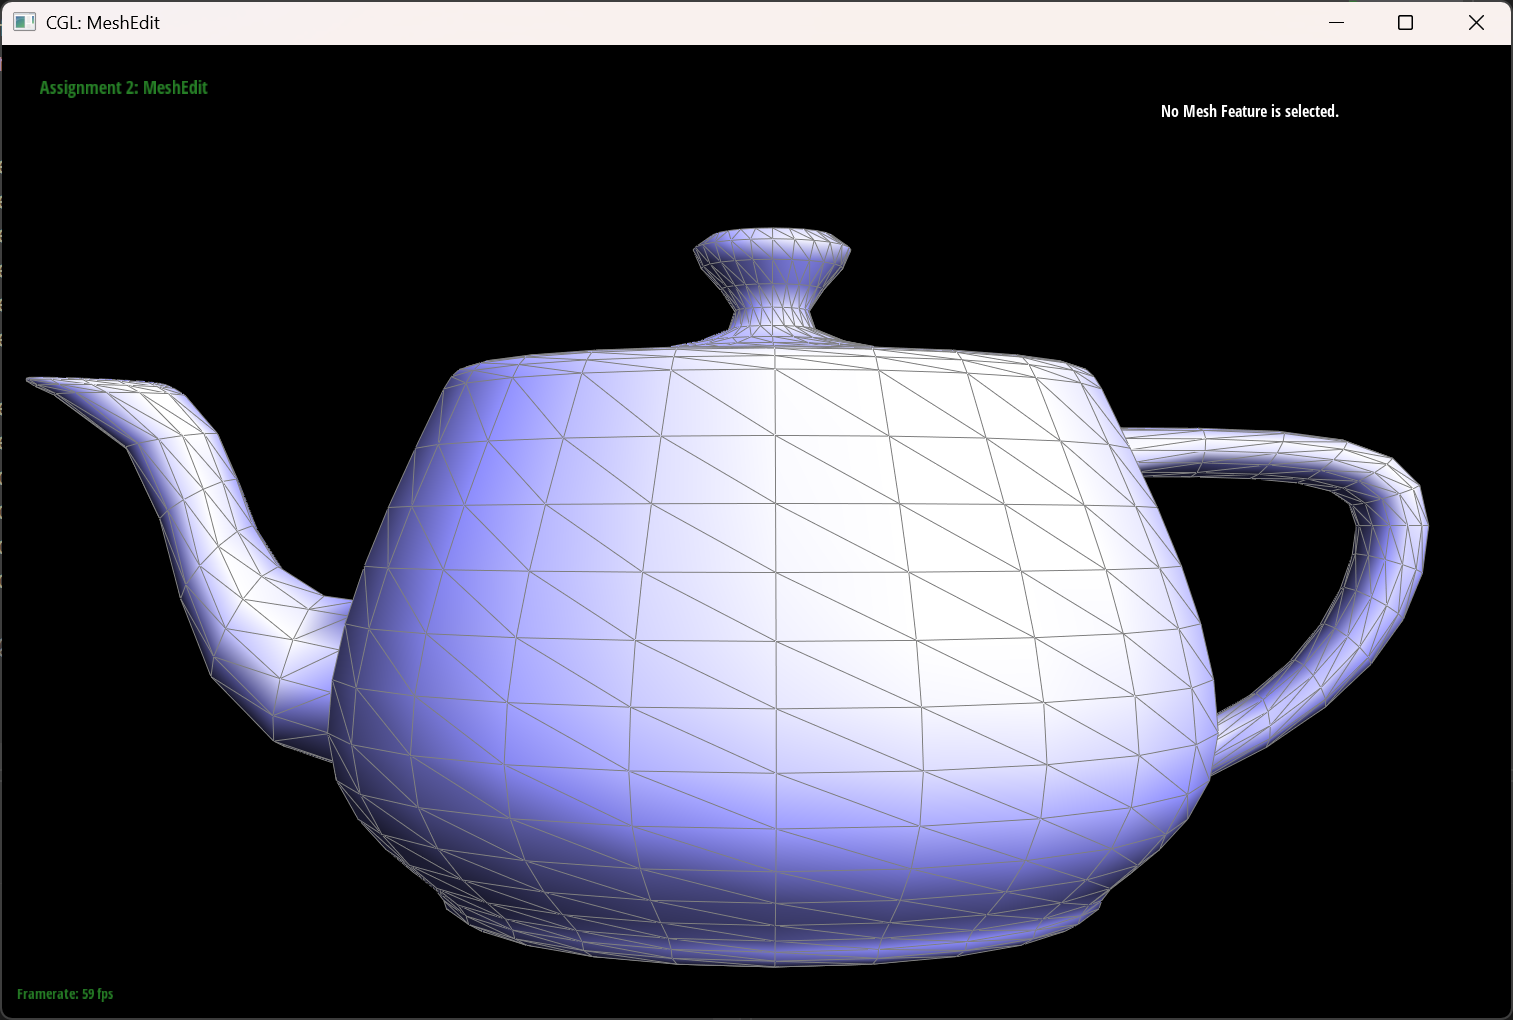
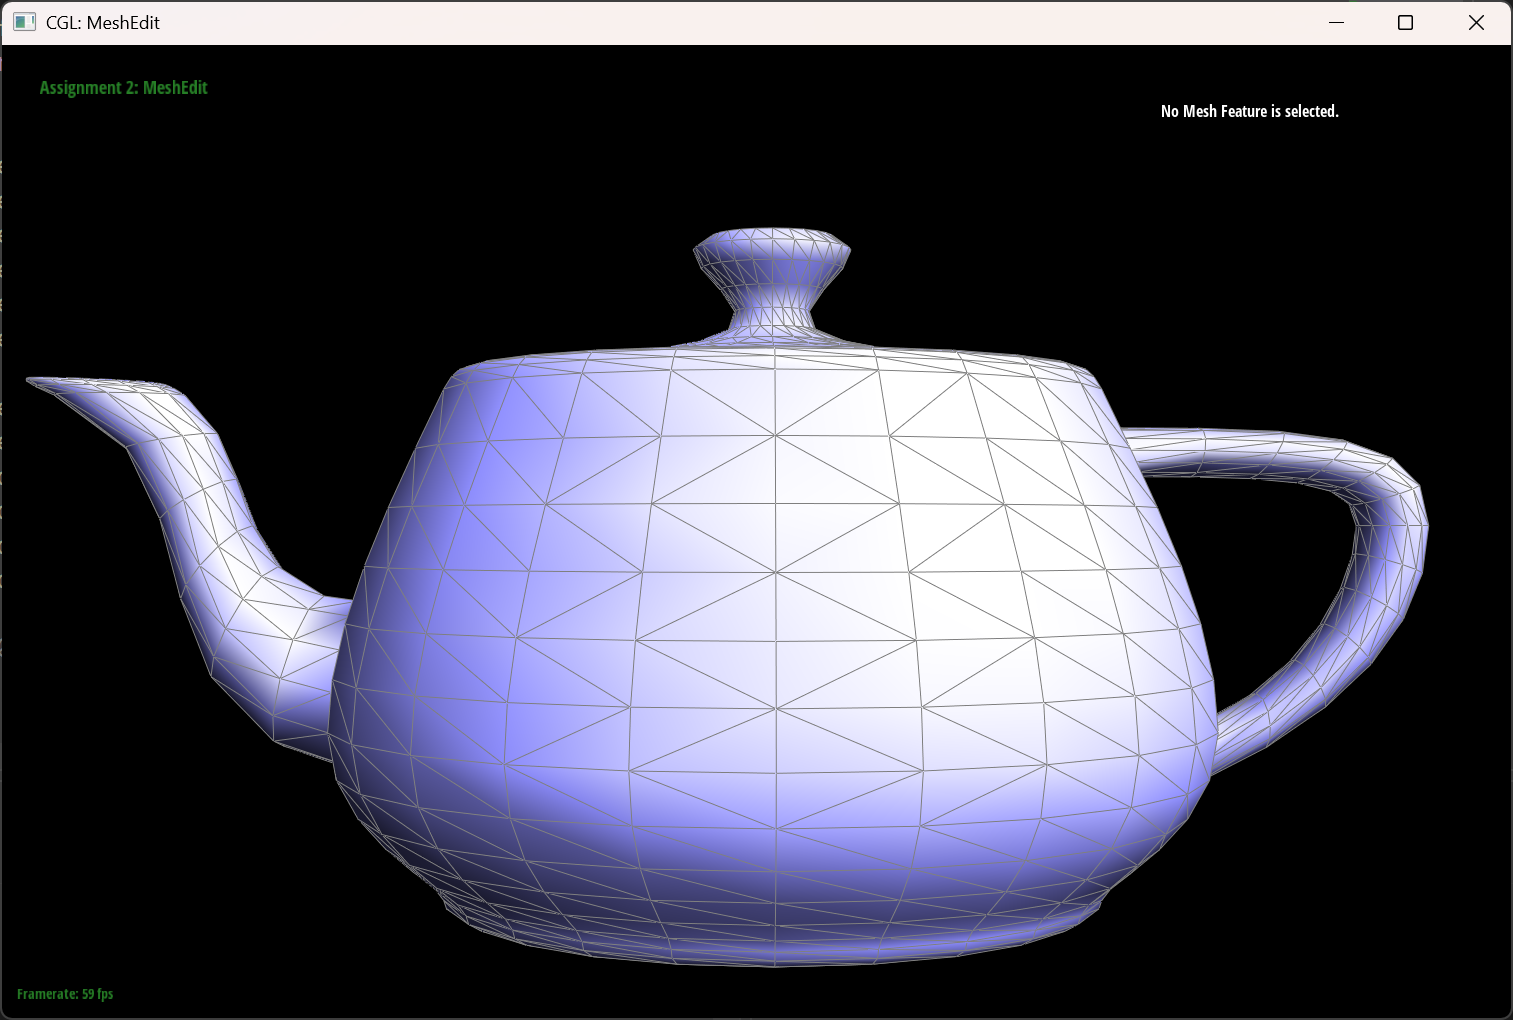
The teapot result
 |
 |
|---|---|
| The original teapot | The teapot woth some flipped edges |
The freakin’debug journey
From the draft, you probably noticed that I initially wrote the vertex $c$ and $d$ in the wrong place. Because I sticked to my draft so closely, I kept checking the errors in my code, not the draft itself:(.
Part 5: Edge Split
Briefly explain how you implemented the edge split operation
I first did all the things similar to the filpEdge function(determine possible elements), then I created new edge, face and halfedges. For the new edgeHere’s a picture that contains all the notations I’m using in my code.
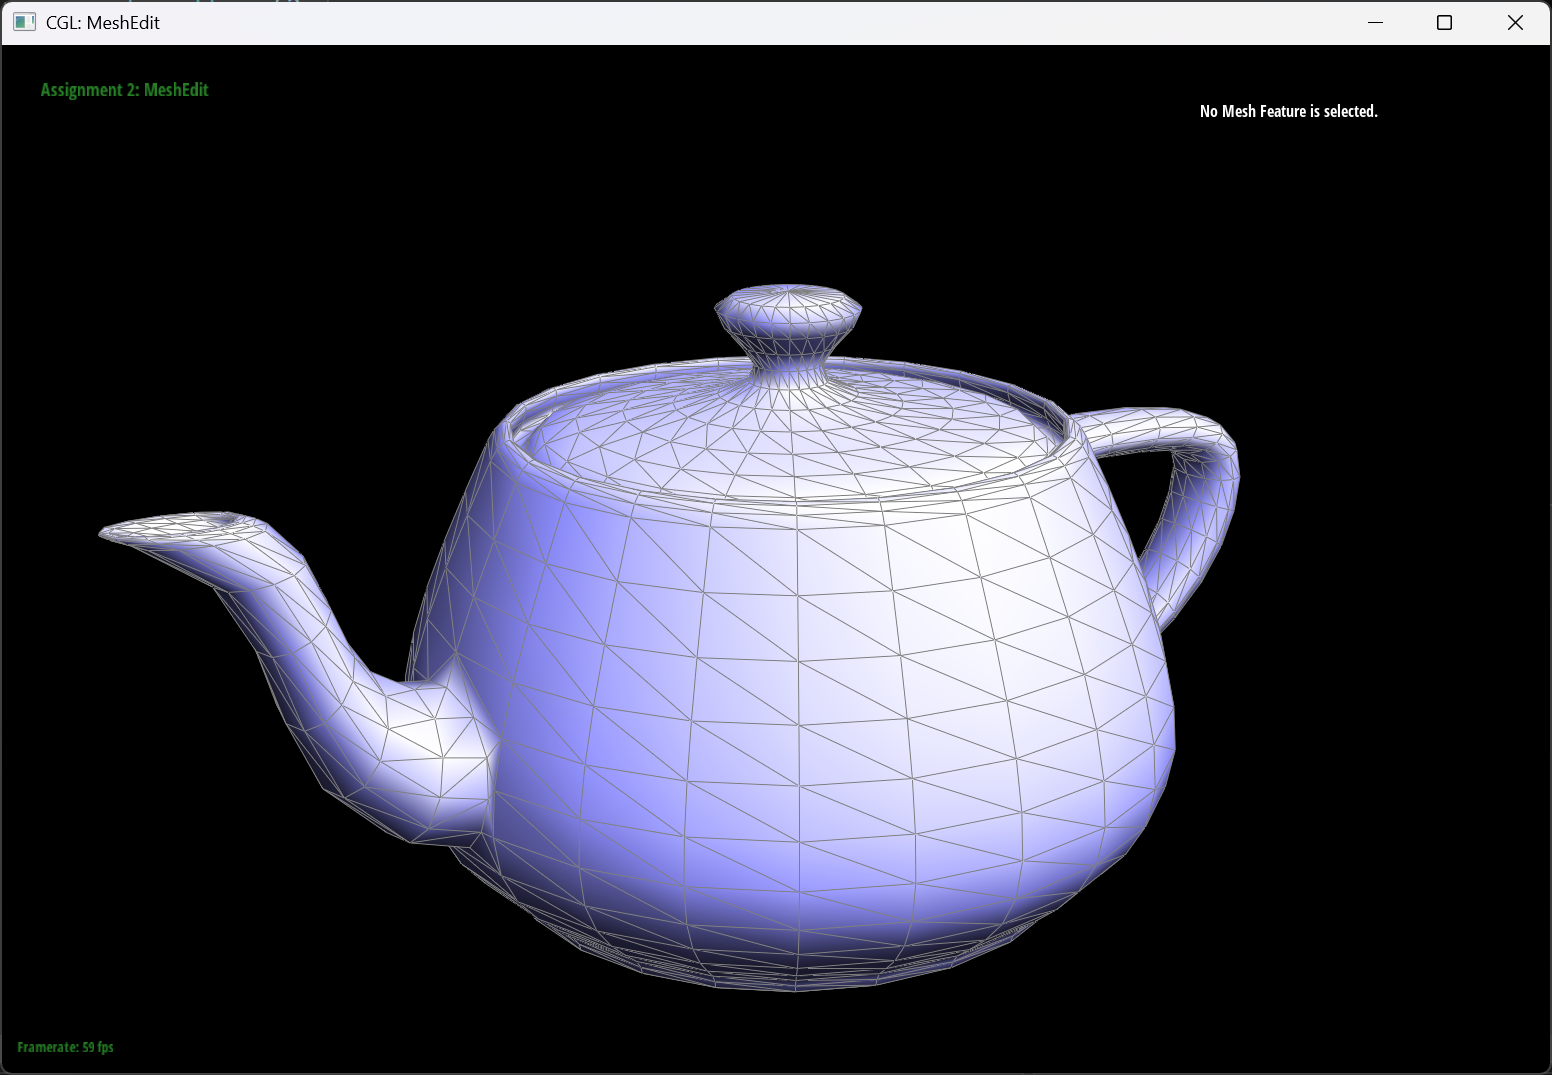
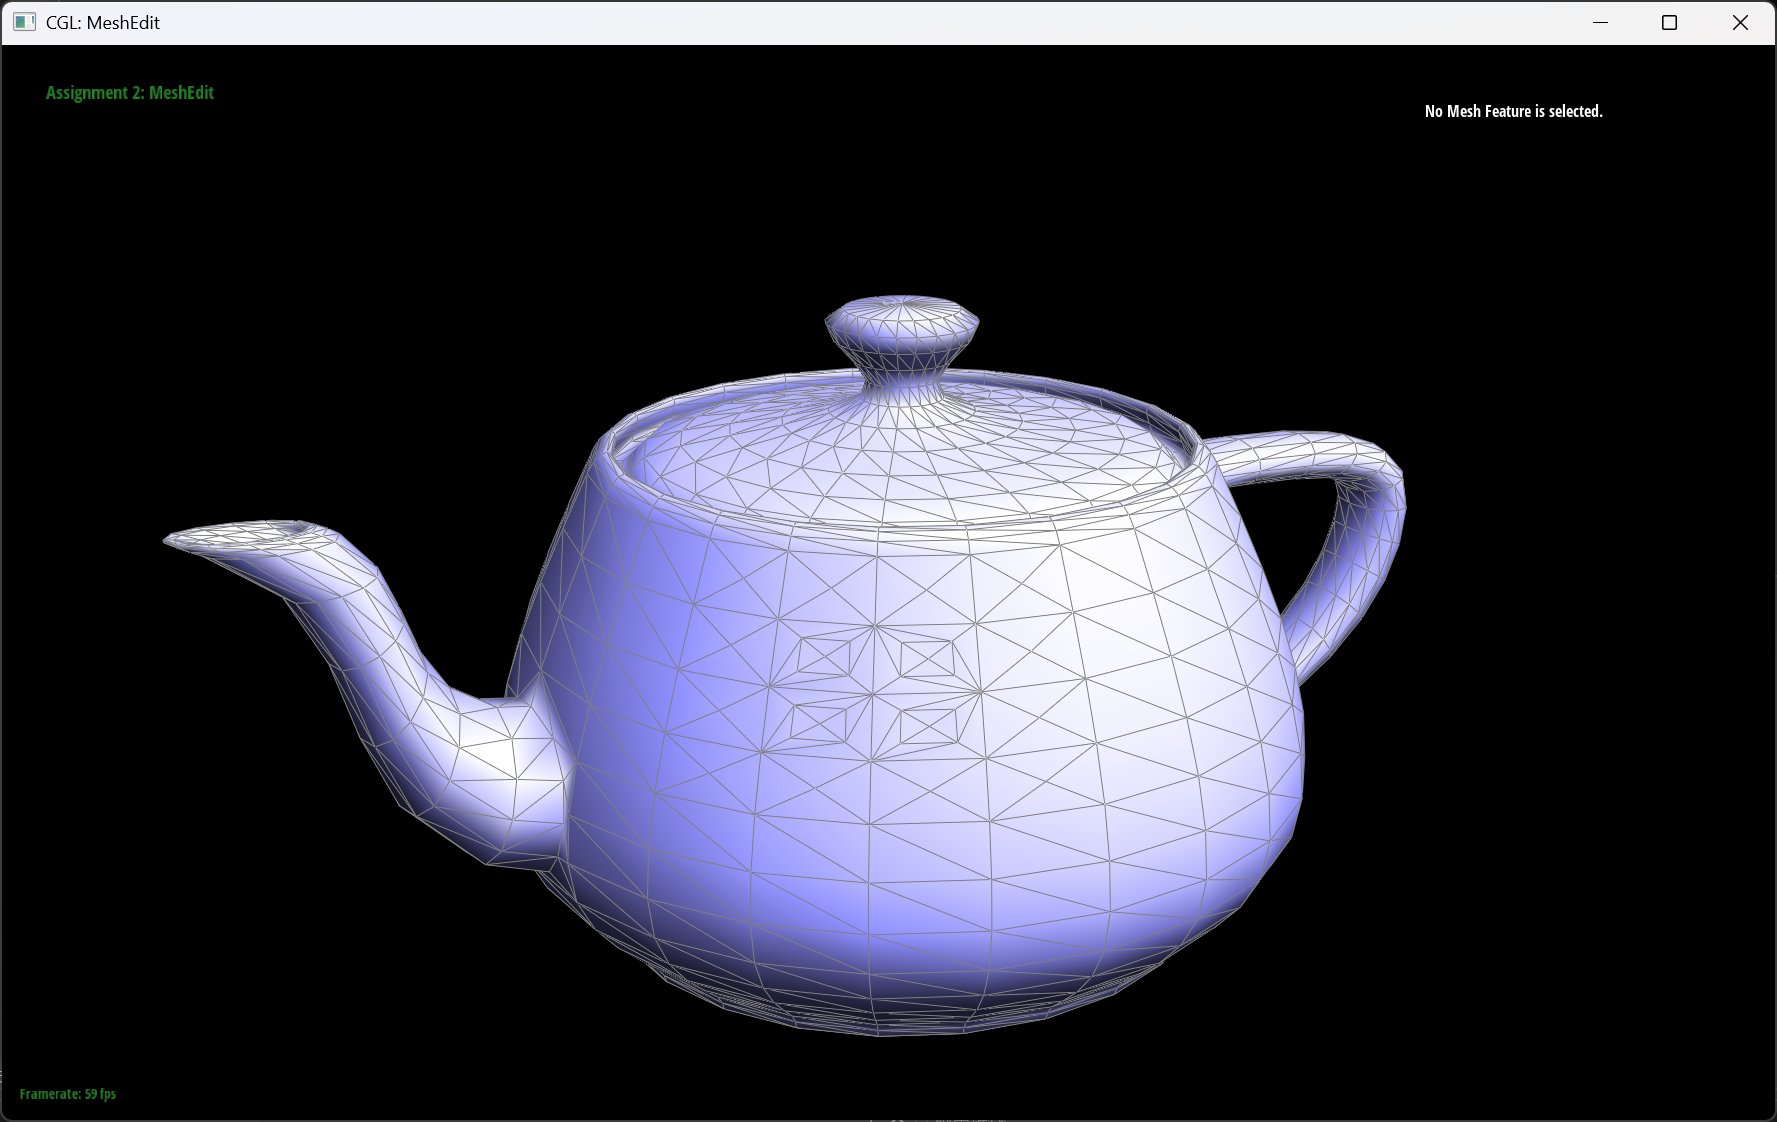
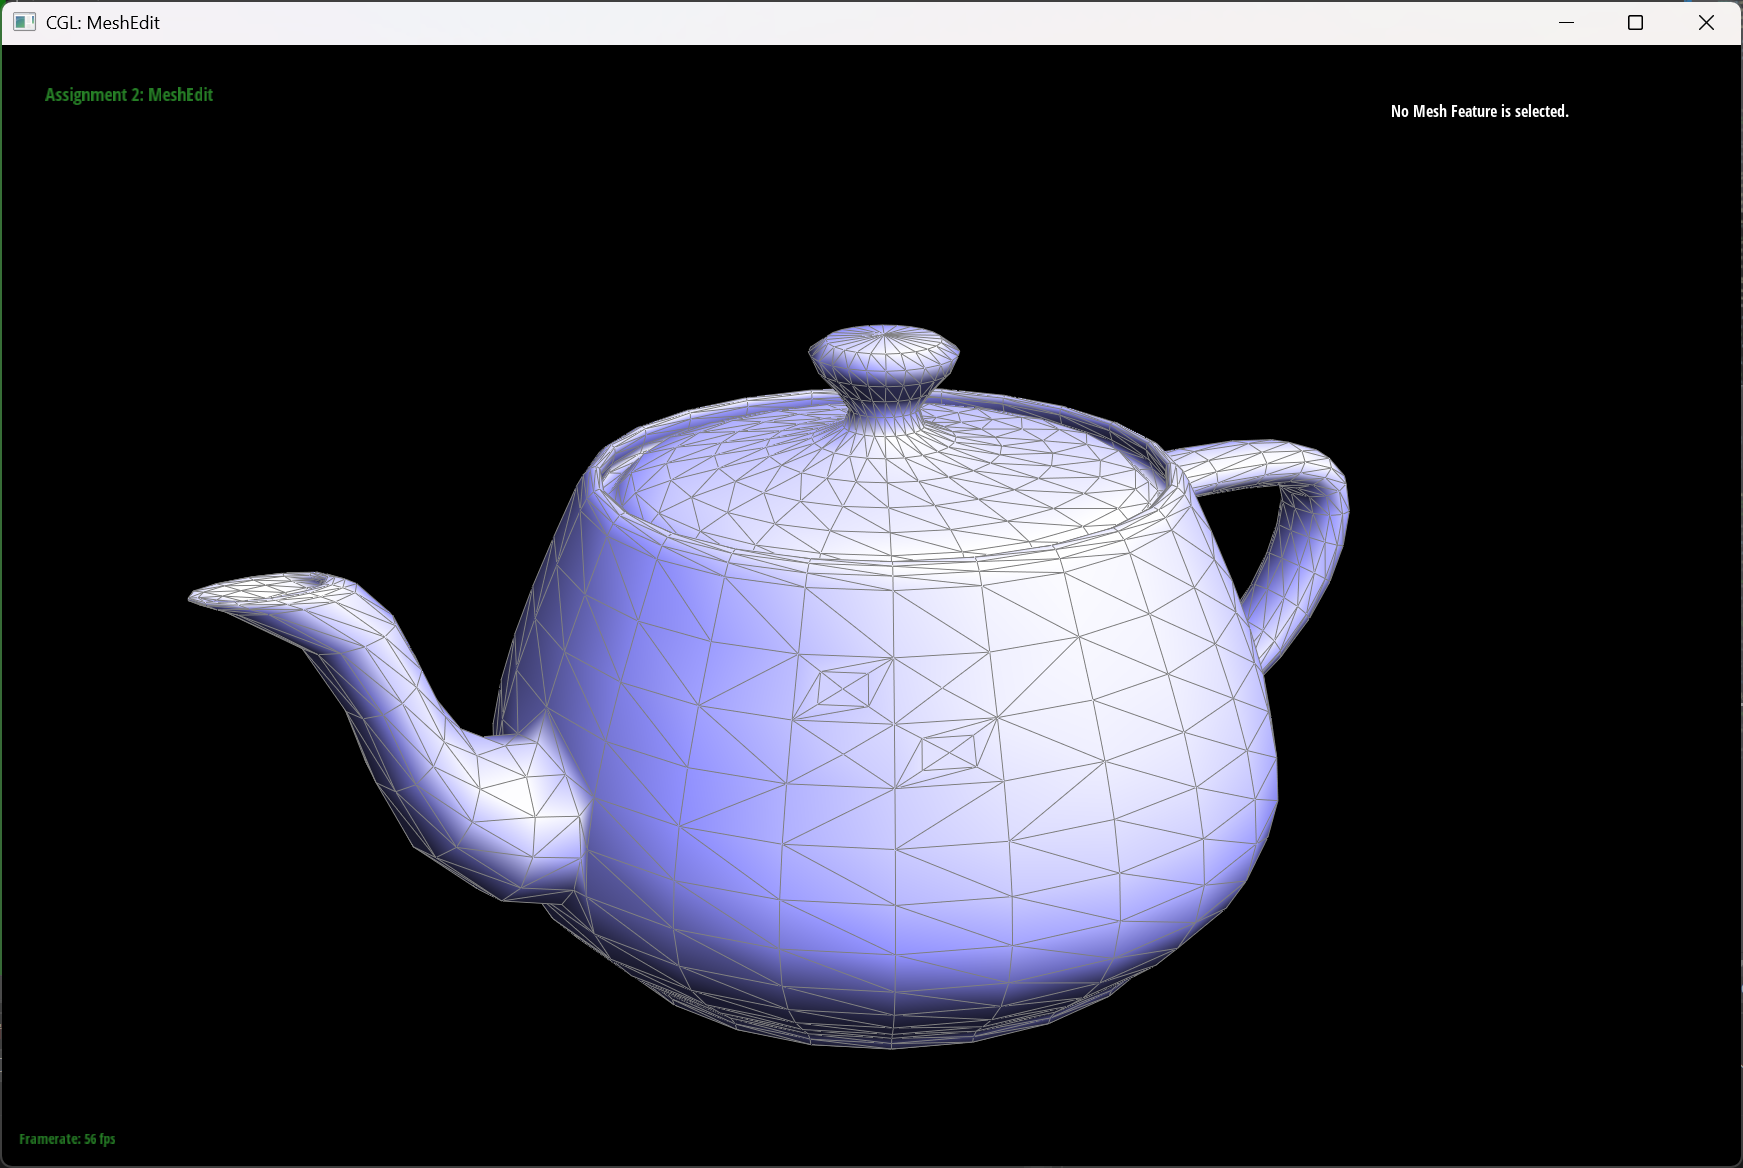
Some teapot result
 |
 |
 |
|---|---|---|
| The original teapot | The teapot with some split edges | The teapot with some splits and filpped edges |
Part 6: Loop Subdivision for Mesh Upsampling
Briefly explain how you implemented the loop subdivision
I first compute new positions for all the vertices in the input mesh, using the weighted average formula given in the question. Mark each vertex as being a vertex of the original mesh, and compute the updated vertex positions associated with edges new positions. Then loop through the mesh to split edges and setting new halfedges generated, as well as filp any new edge that connects an old and new vertex to make the mesh more “organized”. Finally we copy the new vertex positions into Vertex::position.
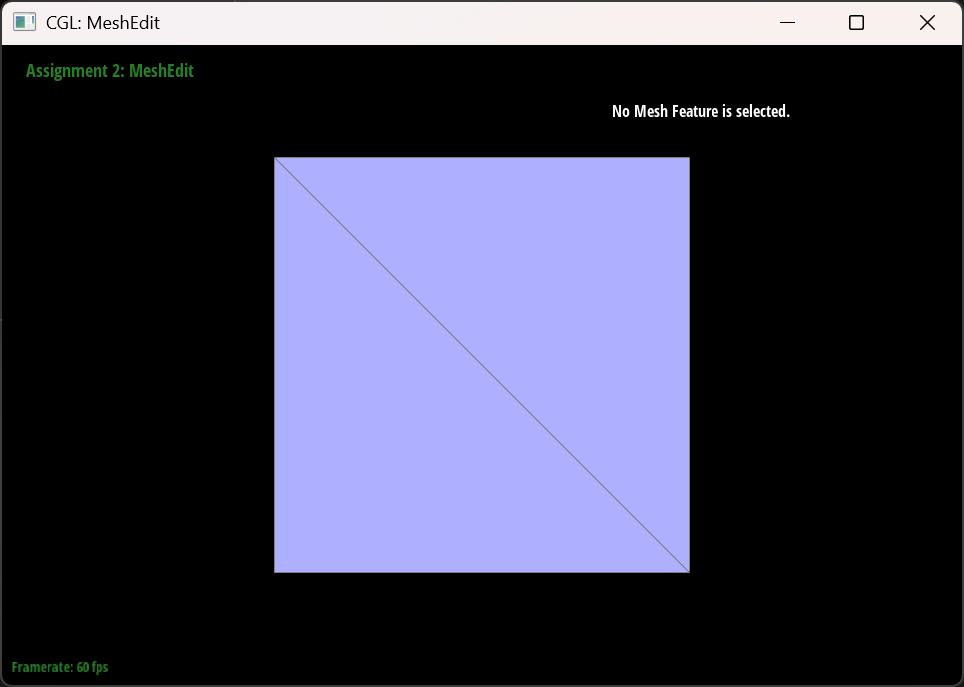
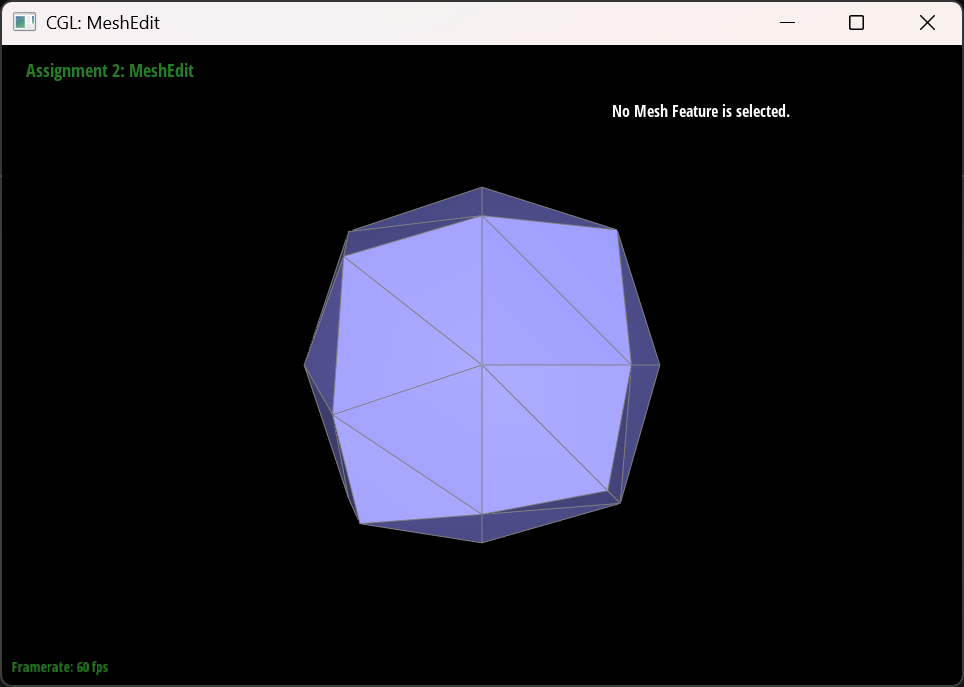
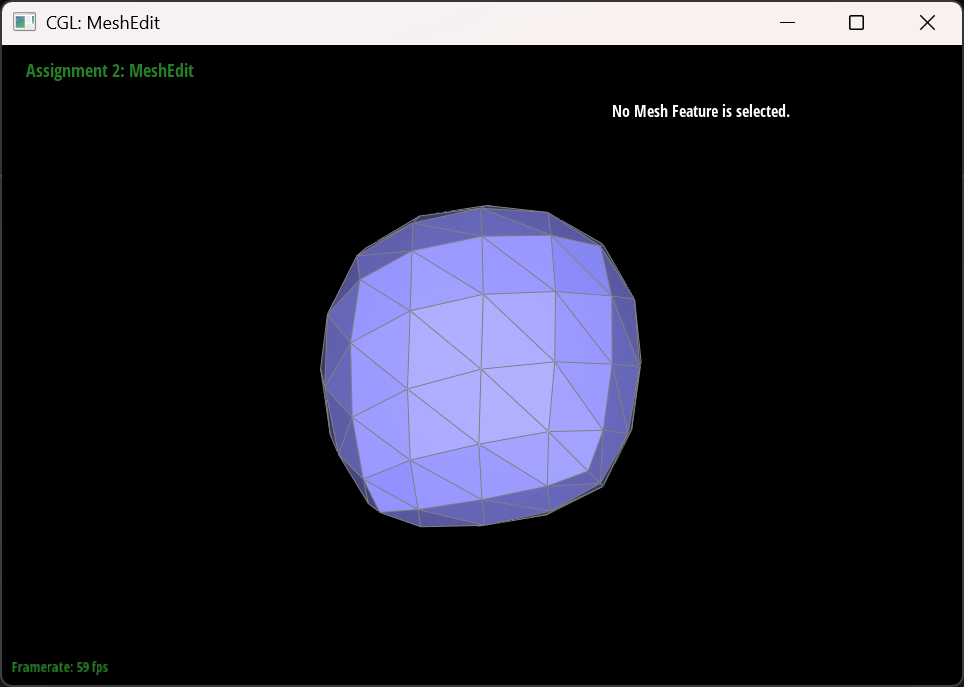
How meshes behave after loop subdivision?
 |
 |
|---|---|
 |
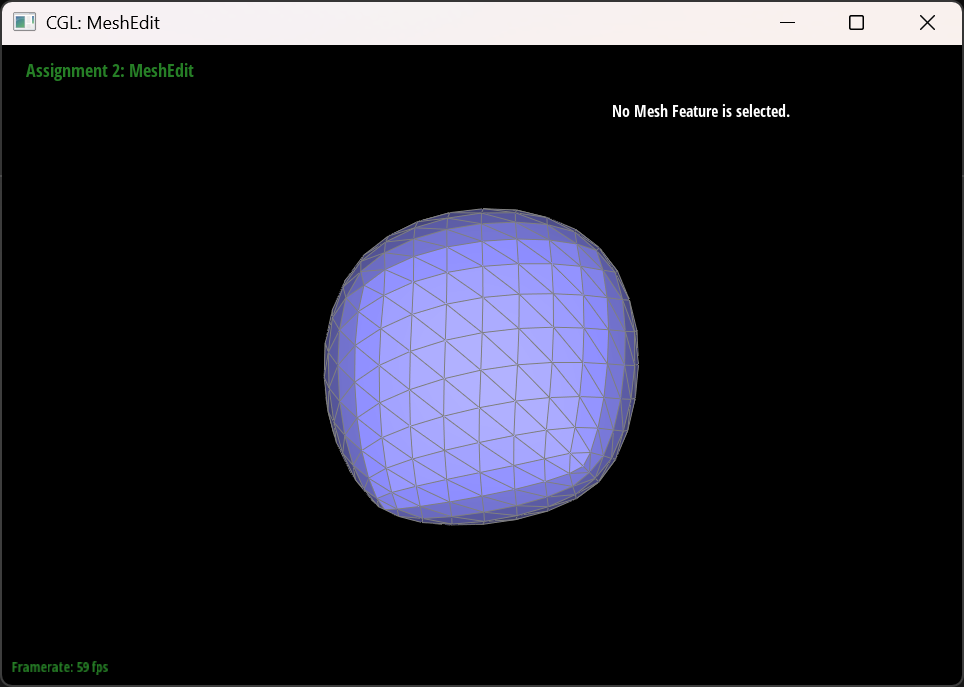 |
Meshes becomes “smoothed out” after multiple times of loop subdivisions. Sharp edges and corners become more rounded and less sharper than before.
Yes, pre-splitting some edges works. Loop subdivision applies a weighted averaging scheme when repositioning vertices. If edges are closely spaced(i.e. pre-splitting to make edges closely spaced / evenly spaced), the averaging effect is localized rather than spread out over a large area, reducing the smoothing effect.
The Asymmetric Cube
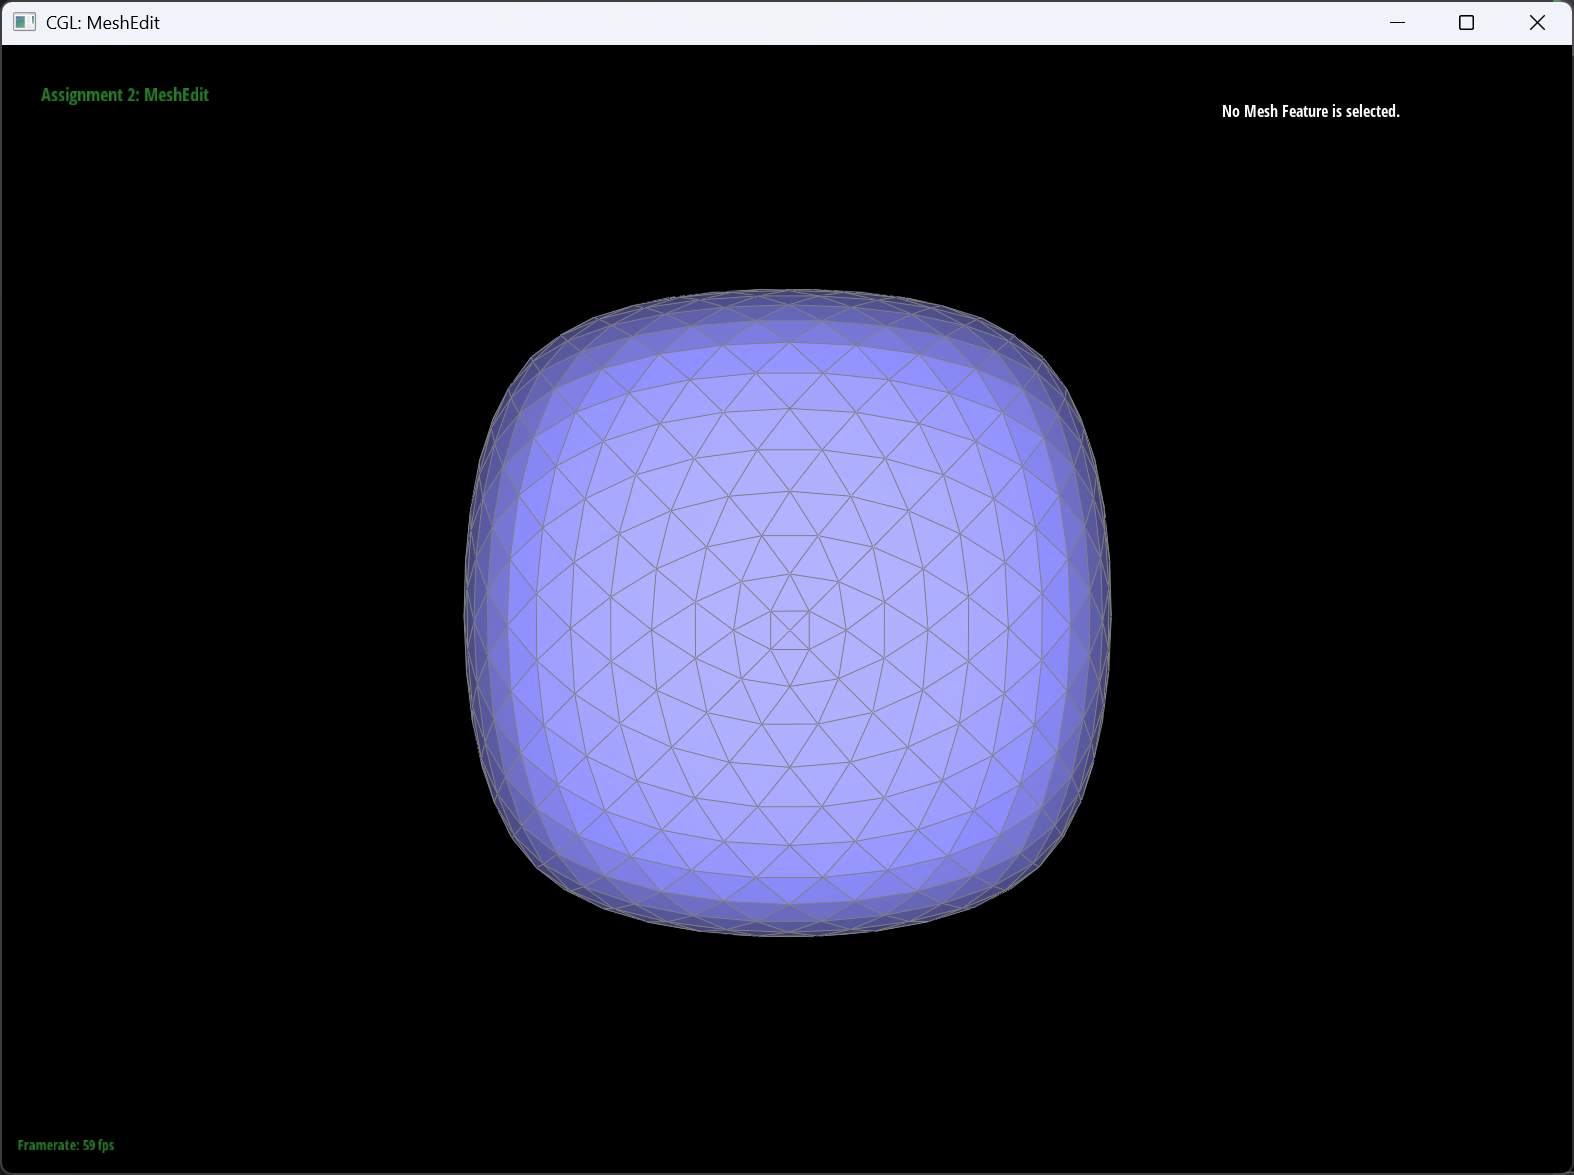
Asymmetry appears after multiple iterations, despite the cube starting with a symmetric structure. This happens due to the cube’s original topology, where each face consists of two triangles (not four evenly distributed ones).
Loop subdivision refines each triangle individually, meaning that if some edges are longer or unevenly split, the algorithm treats them differently and there’s asymmetric. The cube’s initial triangulation pattern isn’t perfectly symmetrical, leading to small “drifts” after each iteration.
So, by pre-splitting the cube by adding a “cut” to each surface(formed by 2 triangles/faces), we are able to get a balanced cube. Because every surface are pre-splitted to be exactly the same and symmetrical, so after subdivision, they still remain the same shape and still be symmetrical on same directions.
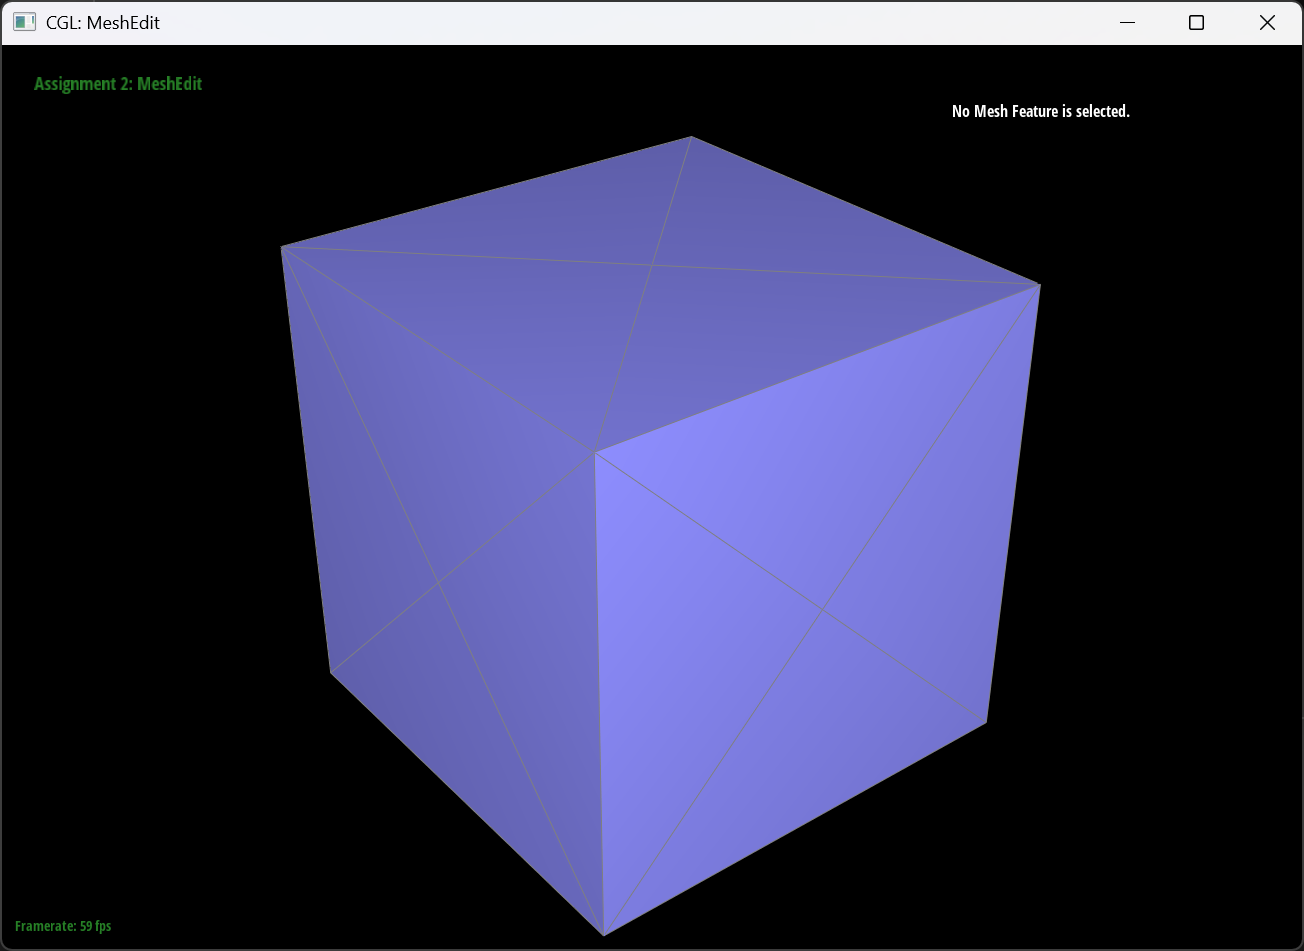
Here is a comparison between original cube and the pre-splitted cube after 4 times of subdivisions.(Left: og. Right: pre-splitted.)
 |
 |
|---|